

|
|
|
|
|
|||||||
| XT660Z T�n�r� Tech Section Tyres, Mods, Luggage & Long distance preparation |
 |
|
|
Thread Tools | Display Modes |
|
|
|
#
1
 29-08-11, 18:28 29-08-11, 18:28
|
|||
|
|||
|
20000km service (DIY guide)
Though my ten is 21 months old, with 20000km on the clock, and still in warranty, I made the decision to do the 20k service on my own and void the warranty.
References: 1. Yamaha Service Manual XT660Z TENERE 2008 2. Haynes Service & Repair Manual Yamaha XT660Z Tenere Jobs performed: 1. Valve clearance adjustment 2. Spark plug change 3. Air filter replacement 4. Engine oil & oil filter change (Jobs that will be performed later on this year: 5. Lubrication of steering bearings 6. Lubrication of rear suspension relay arm & connecting arm pivoting points) Spares changed: 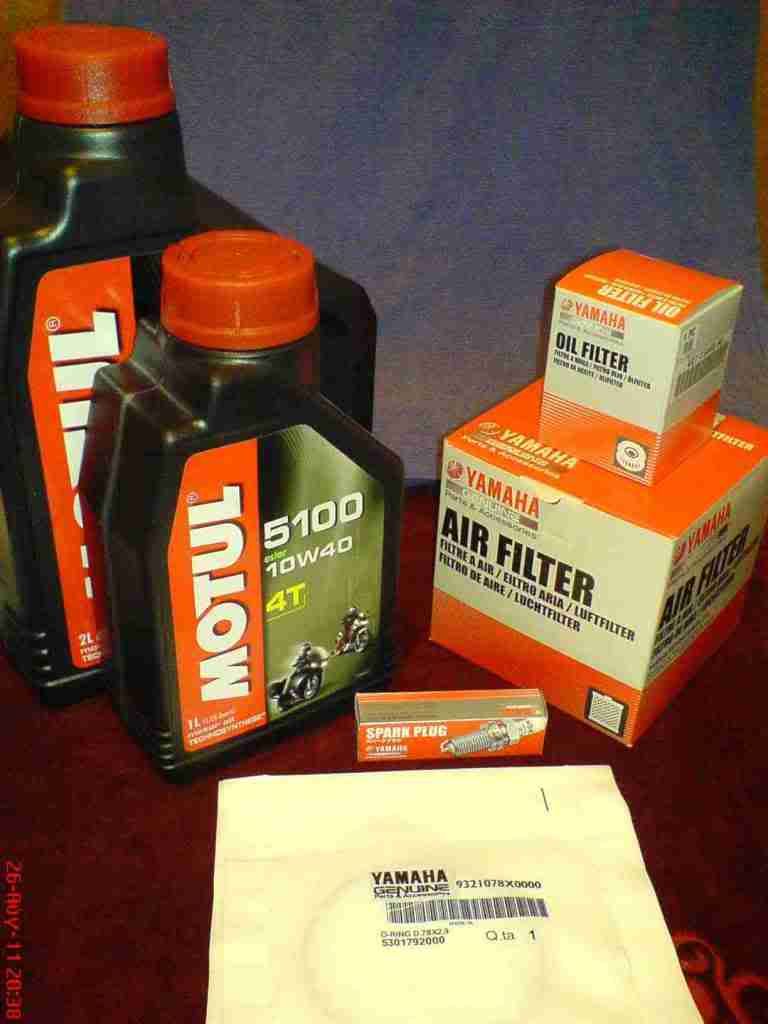
Tools used: 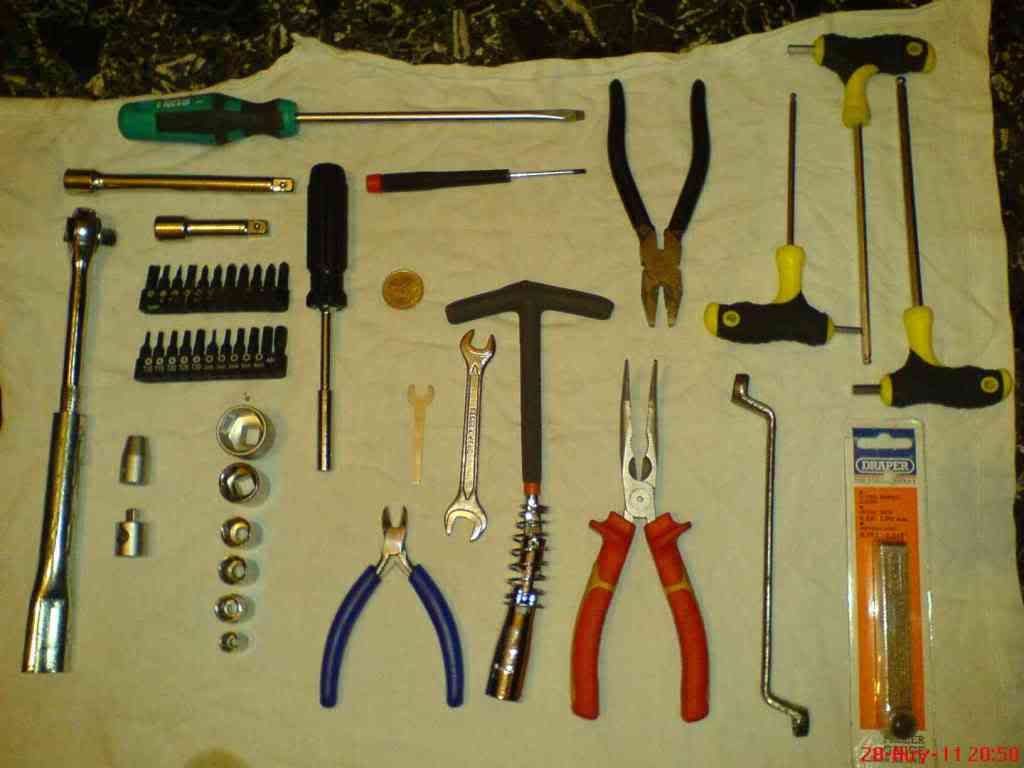
(plus 2 torque wrenches) 1. Firstly, I removed the seat and drained the fuel tank. 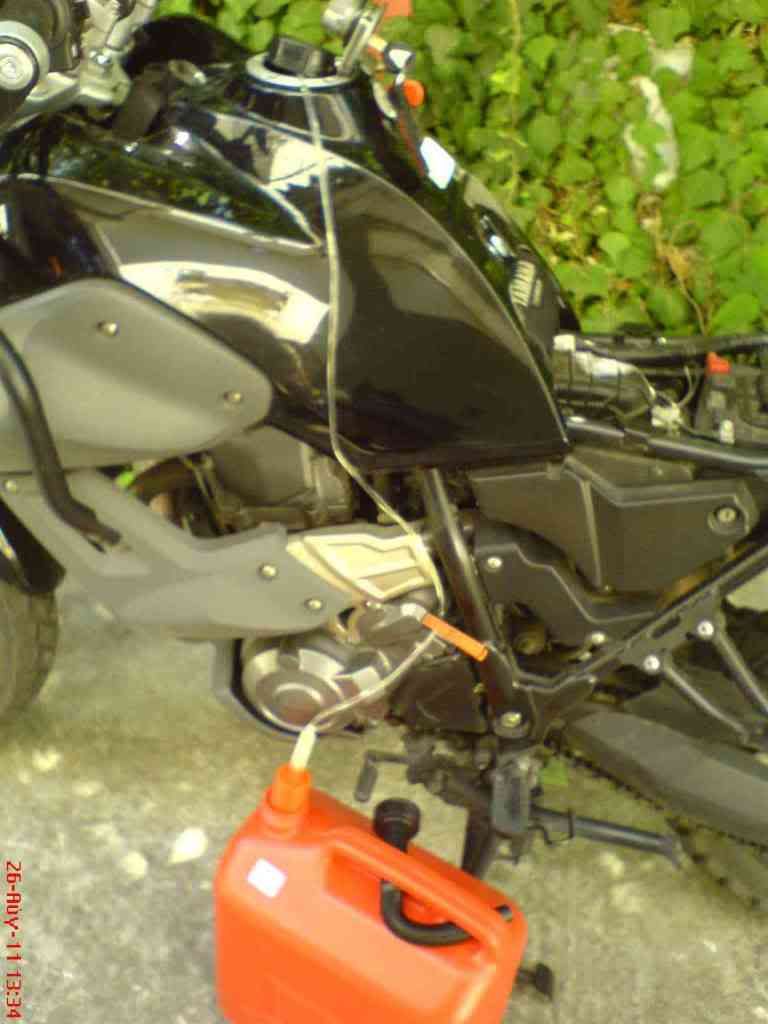
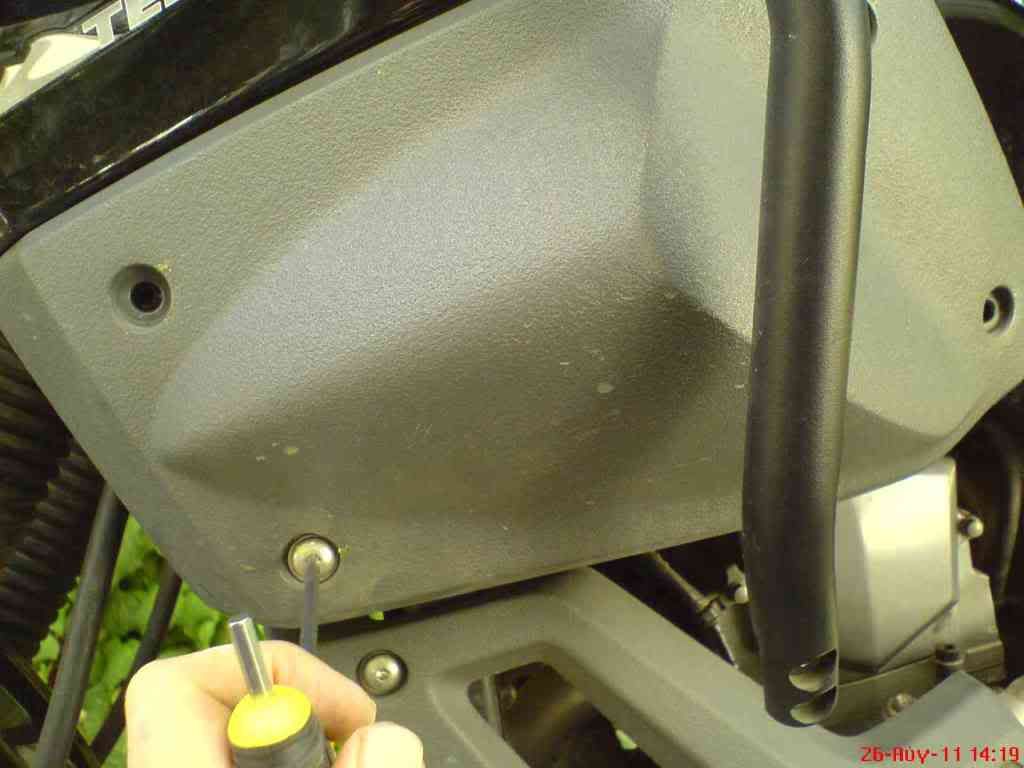
2. Then I removed the fuel tank covers. (The bottom left bolt proved pretty stubborn, and it came out together with its threaded housing/sleeve  ).
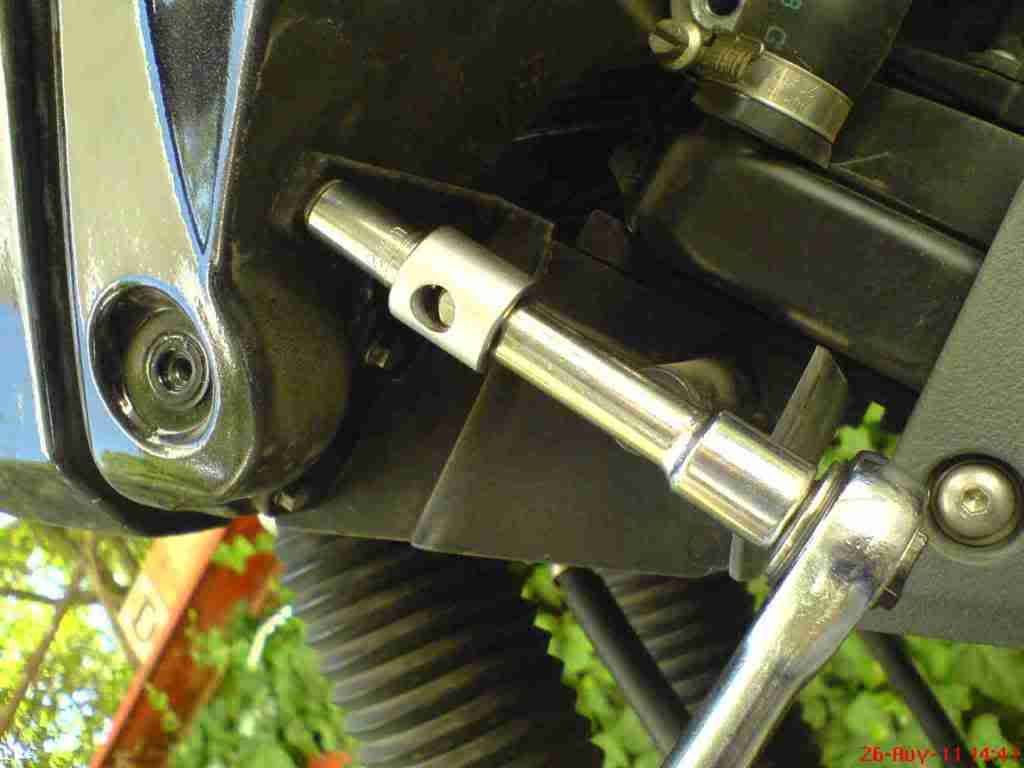
). 3. So I used some glue… 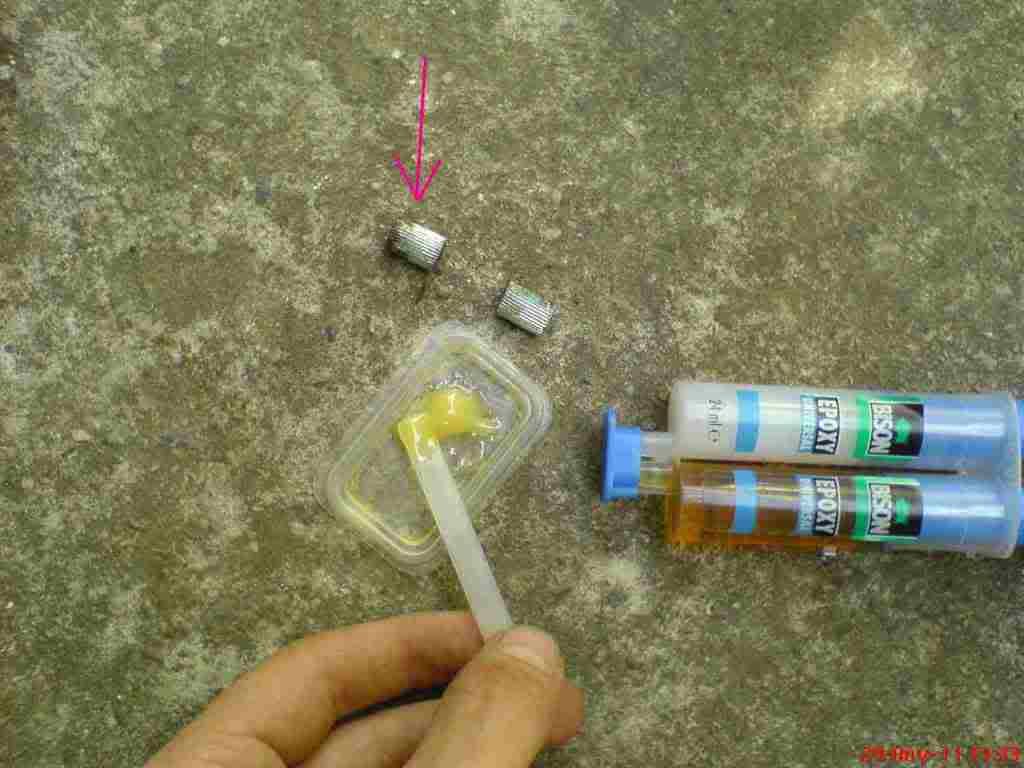 4. … and stuck it back inside the plastic bracket.. 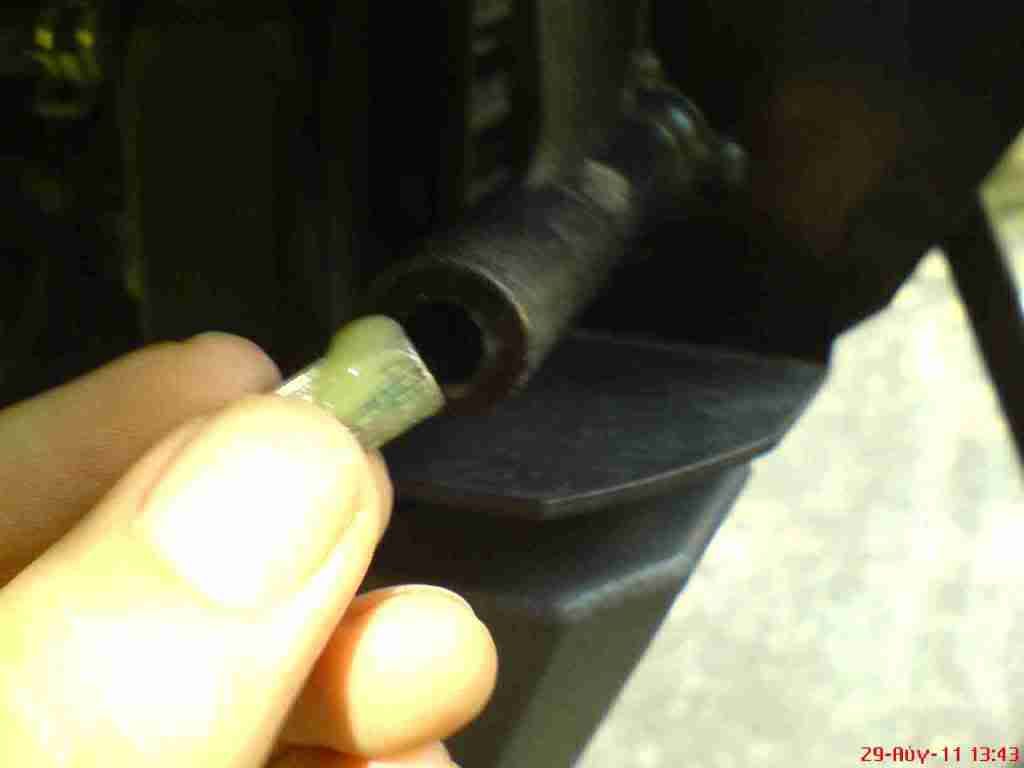 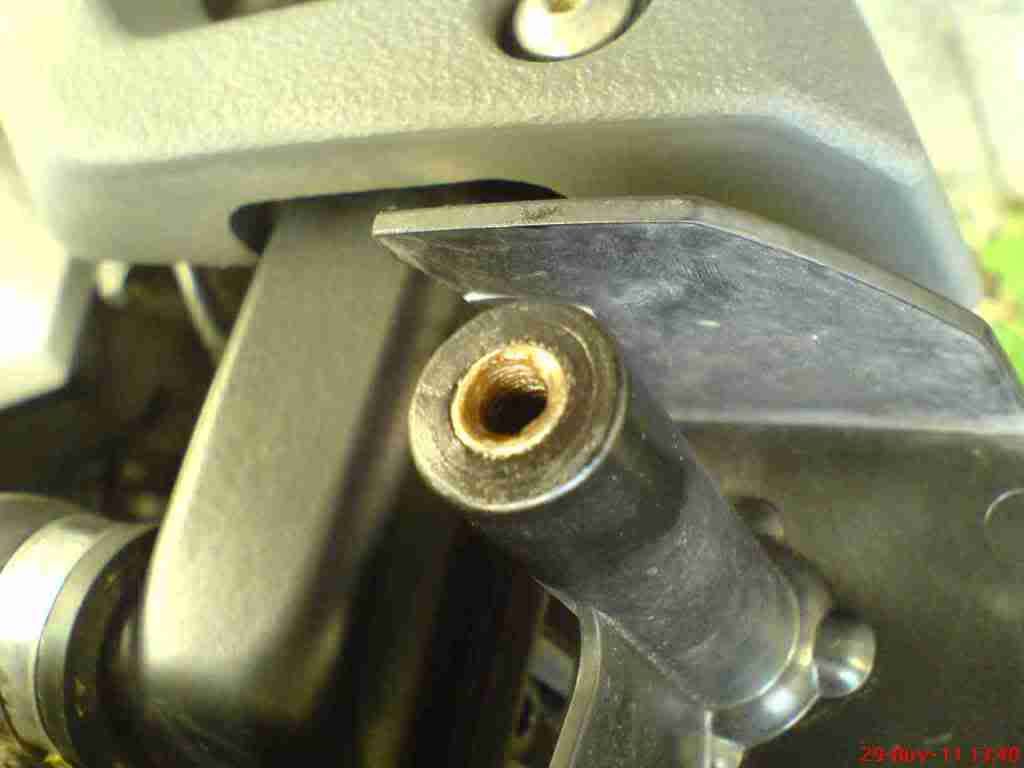 5. I removed the tank bracket, washers and collars… 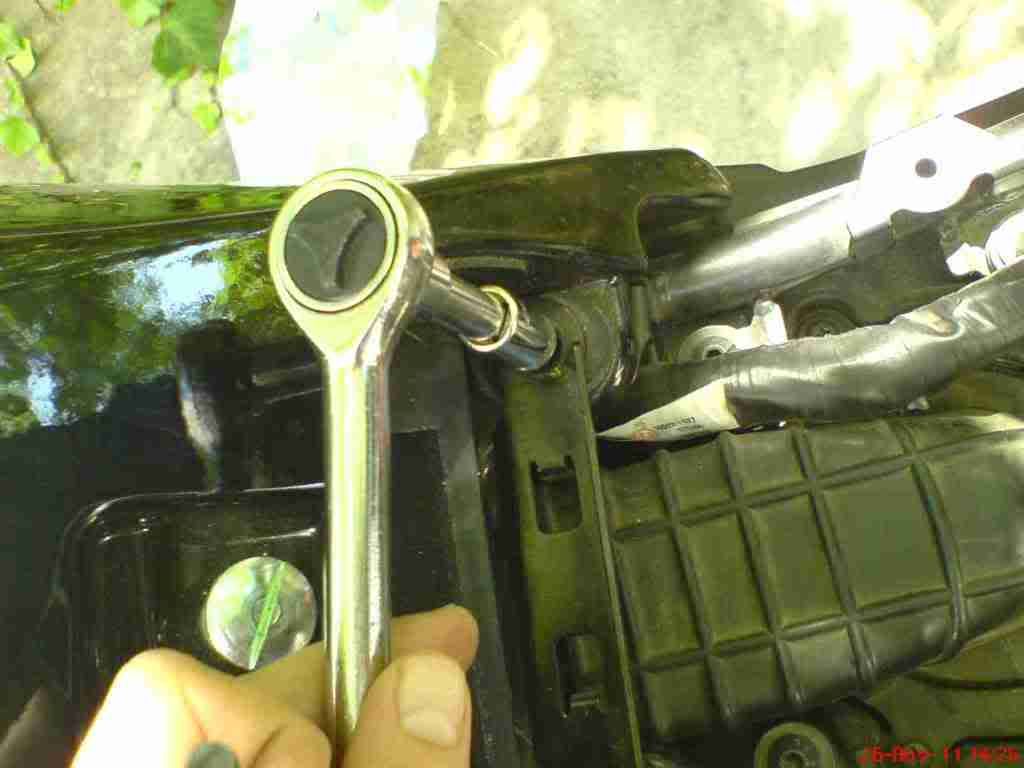 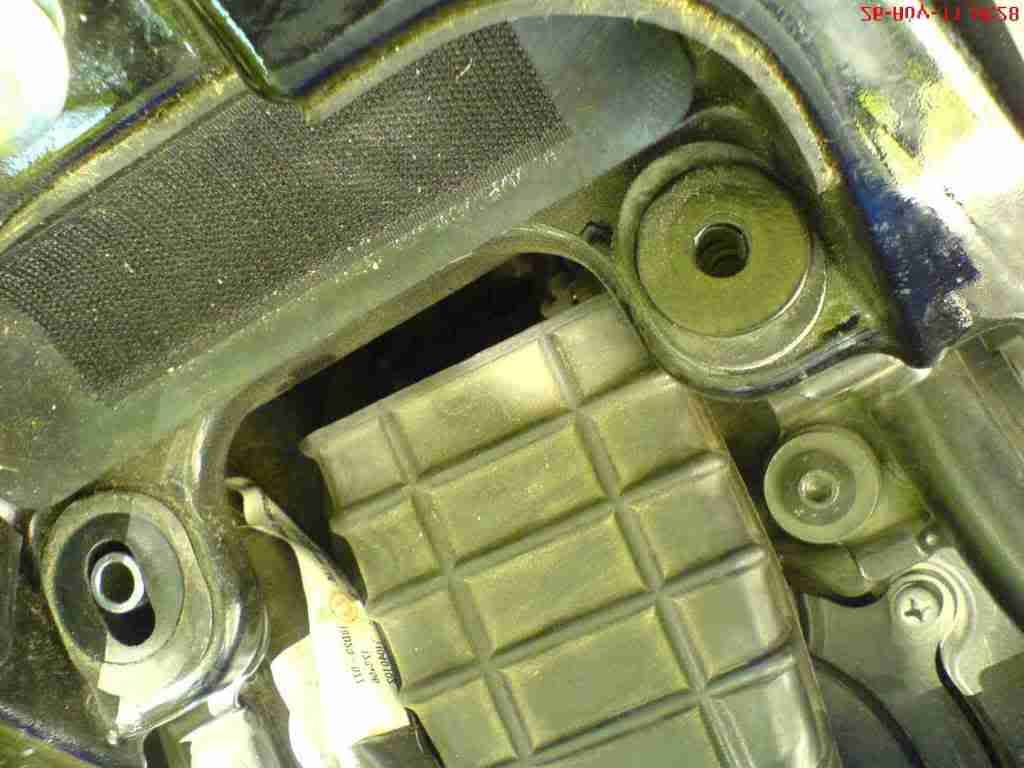 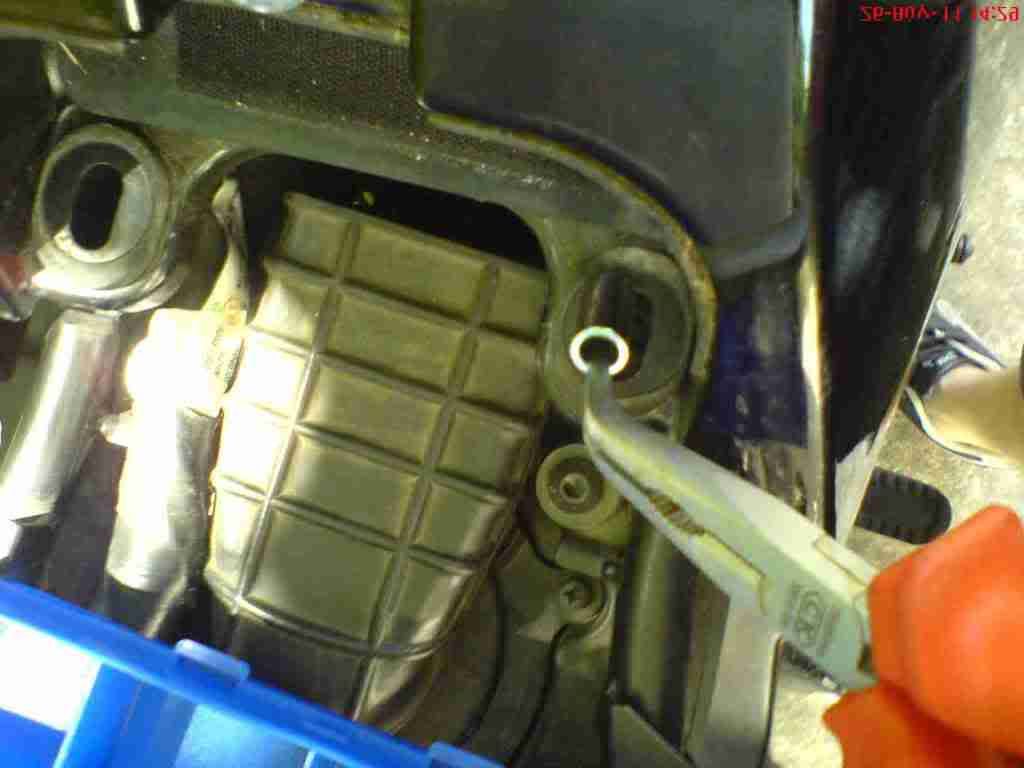 6. …the front bolts (one on each side)…  
Last edited by zeiss11; 04-09-11 at 18:04. |
|
#
2
29-08-11, 18:36
|
|||
|
|||
|
7. �the bolts and plastic brackets�
  8. �the screws and headlight panels (be careful not to lose the sleeves)� 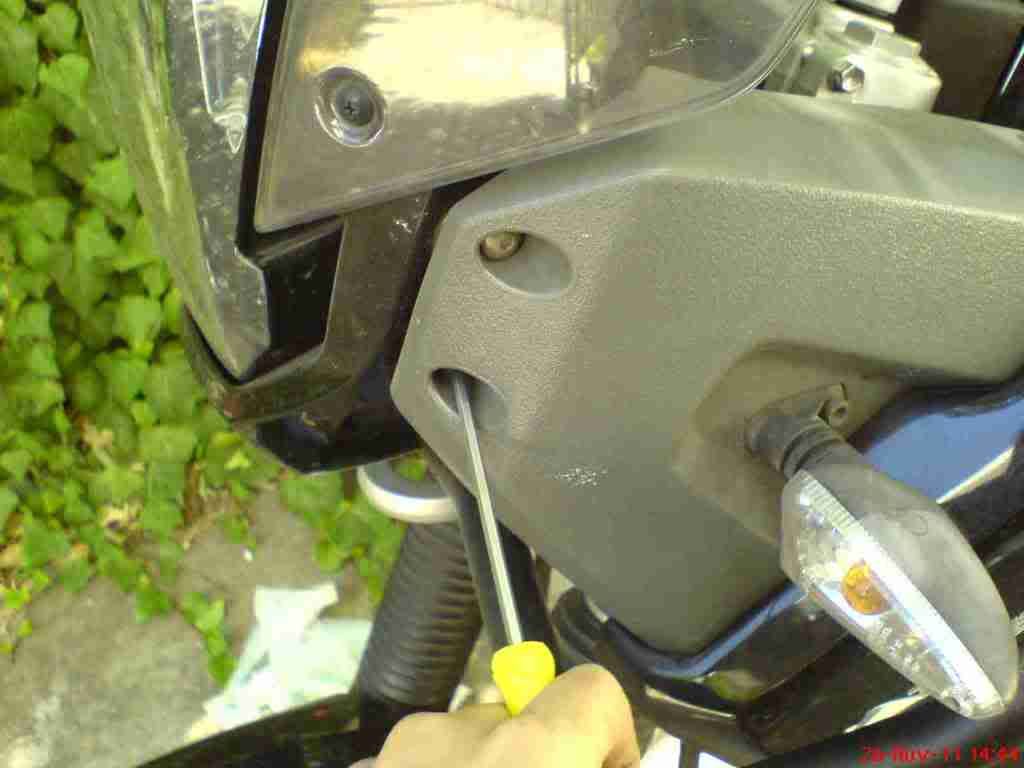 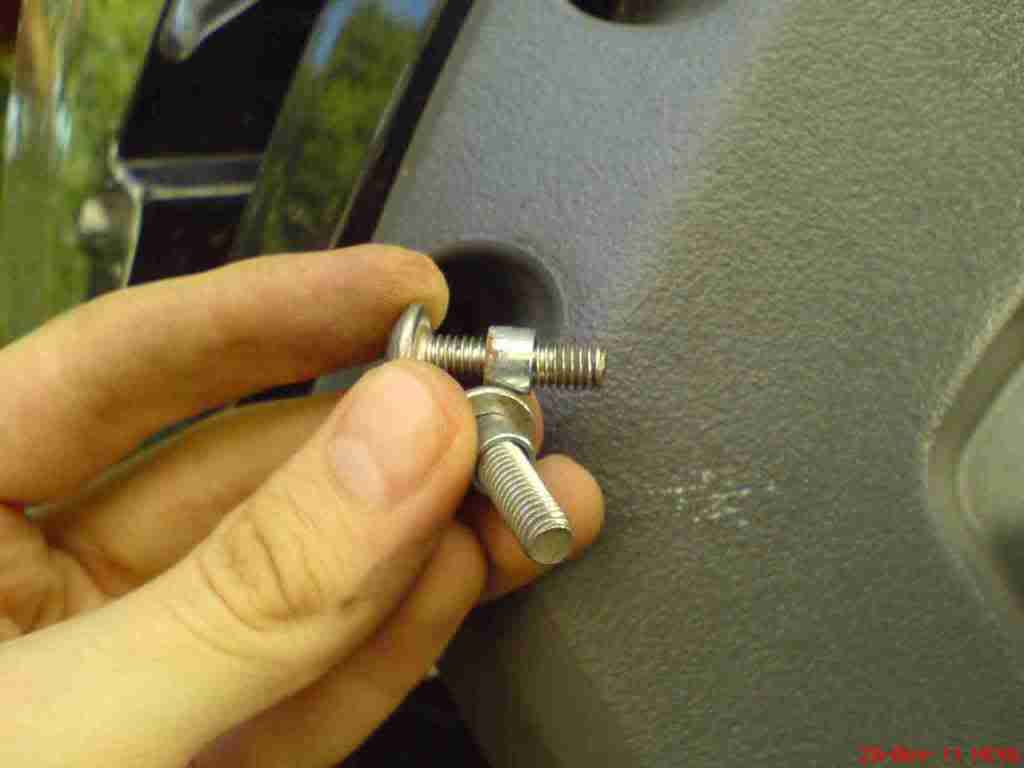 9. I disconnected the turn signal wiring connectors... 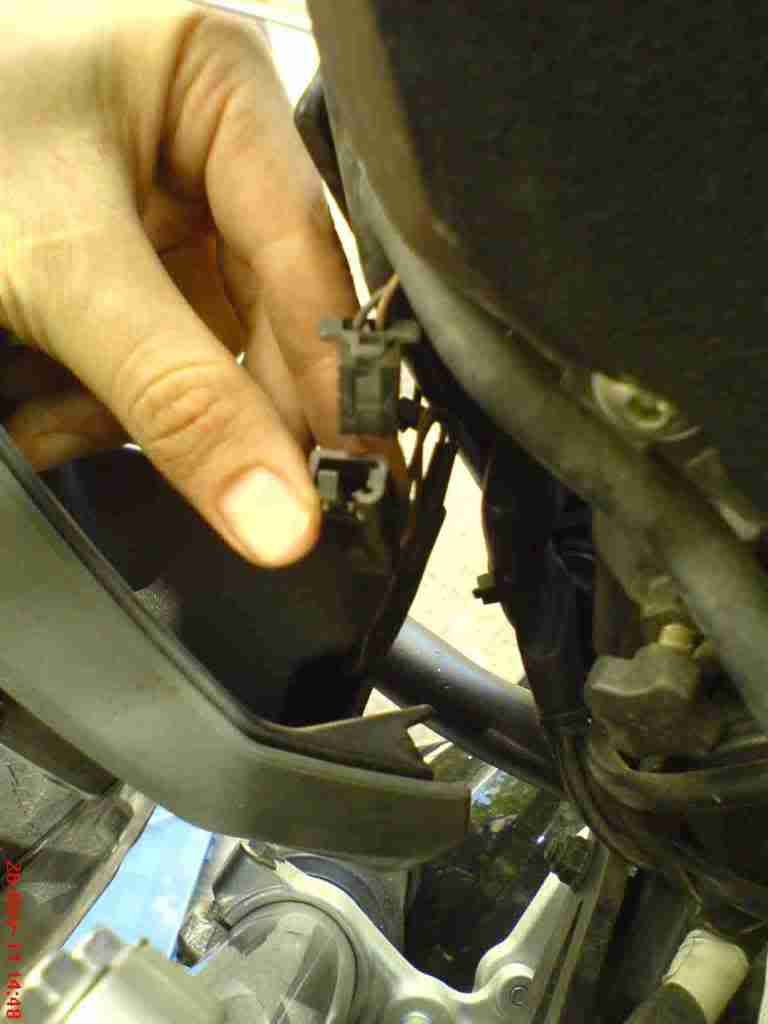 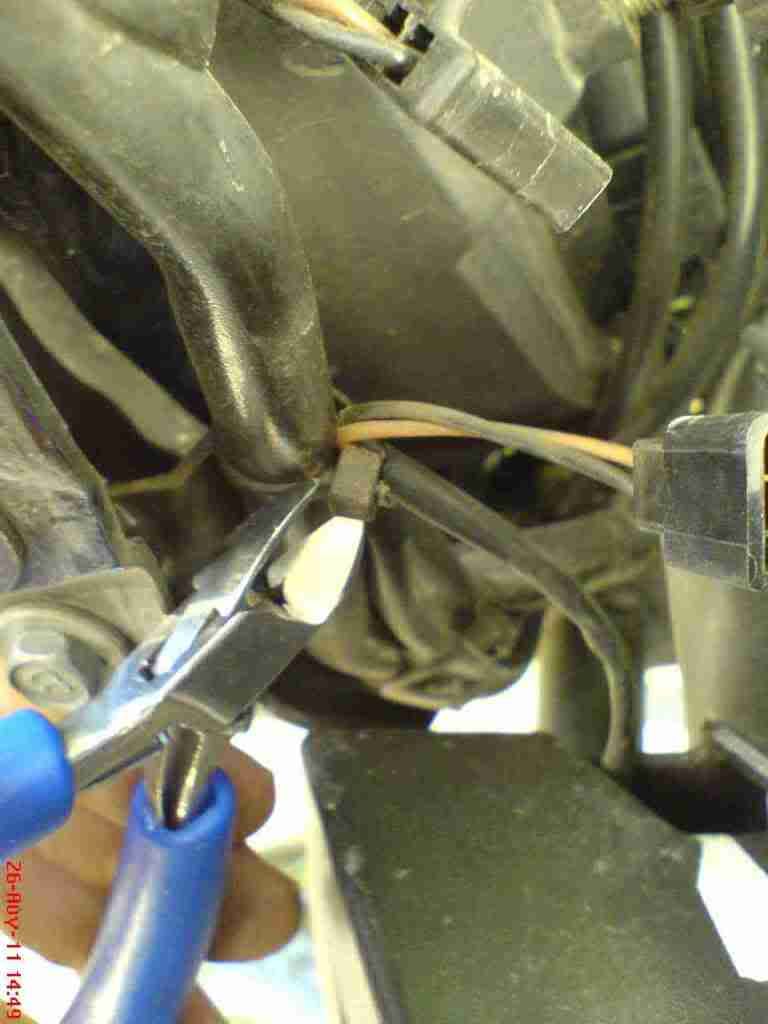 10. �(Take care not to lose the rubber washers)�  11. �and the overflow pipe. 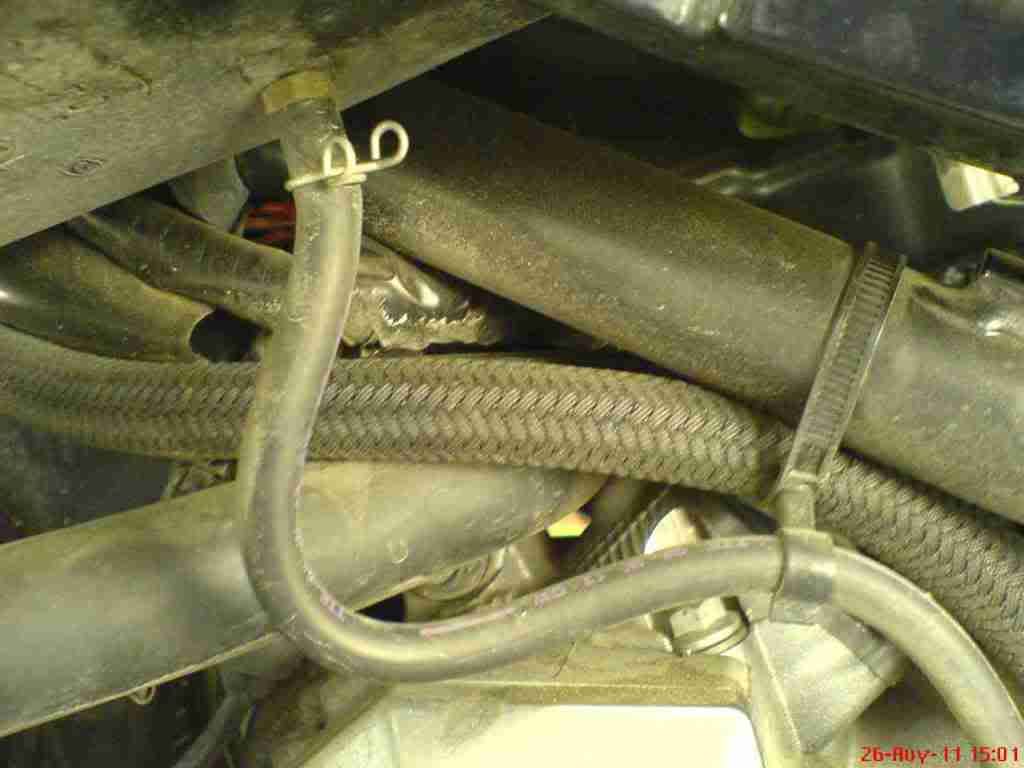 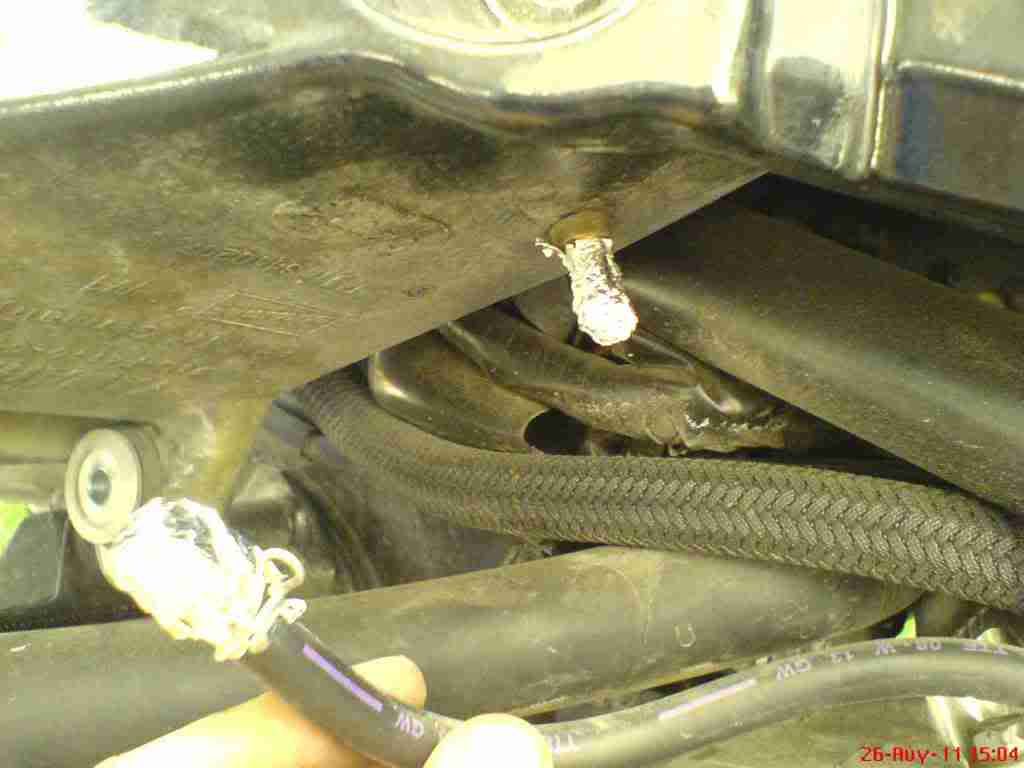 |
|
#
3
29-08-11, 18:43
|
|||
|
|||
|
12. I lifted and supported the tank.
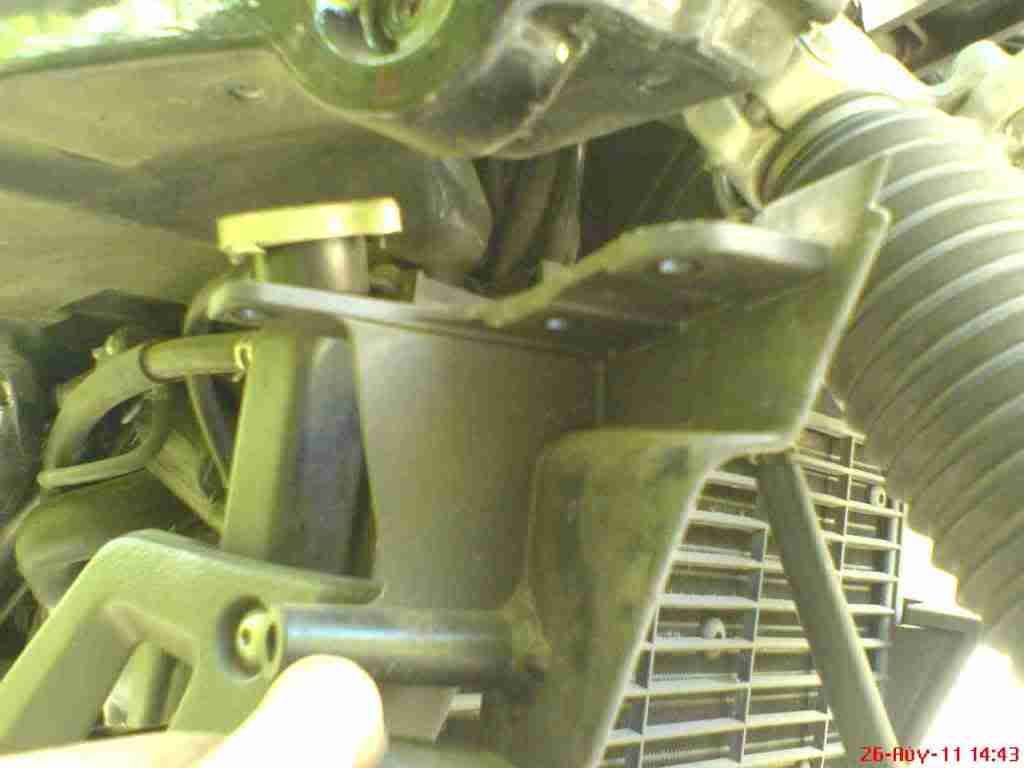
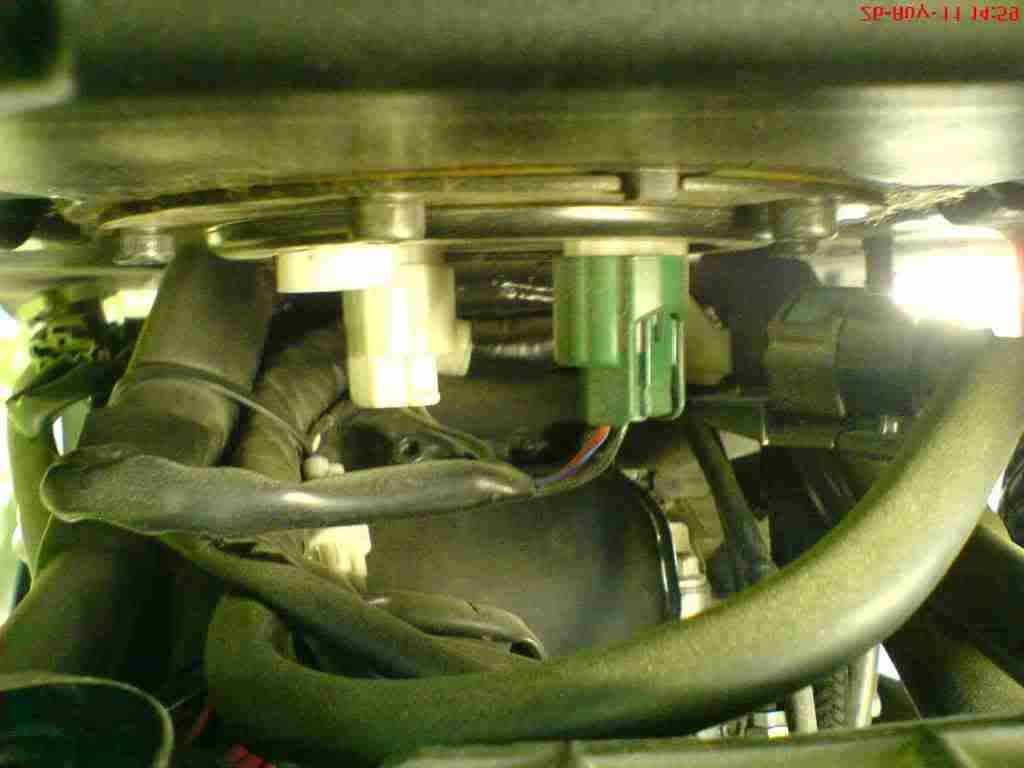 13. I disconnected the fuel sender coupler� 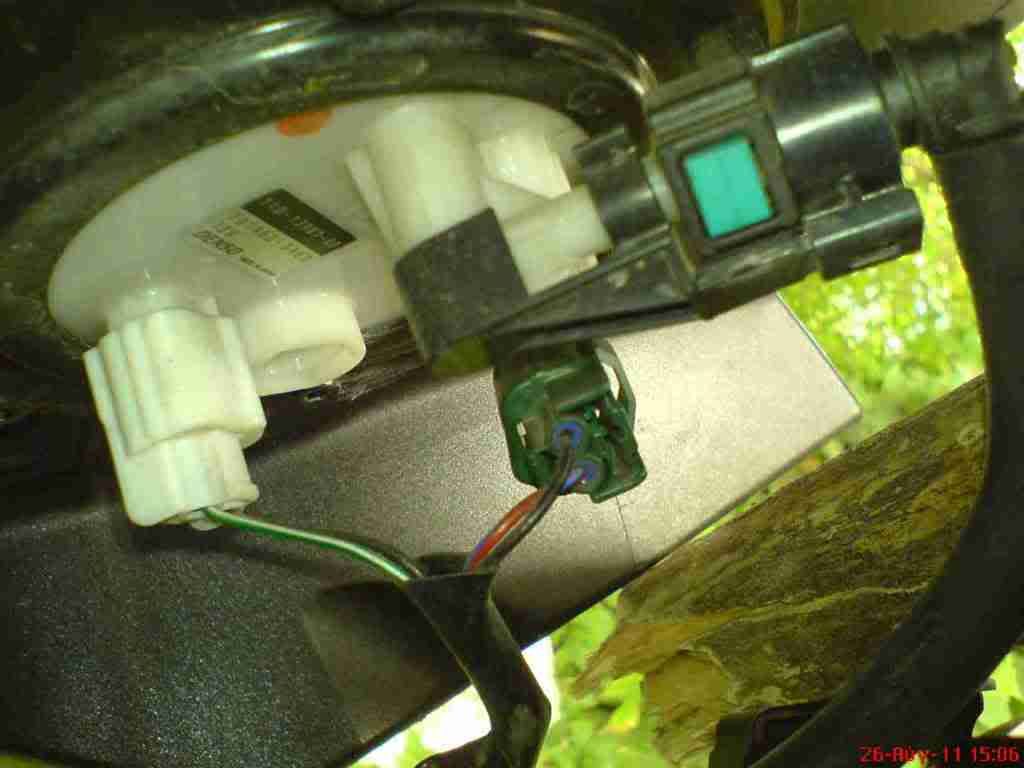 14. �the white fuel pump coupler (this one is tough. Press firmly with your thumb while pulling it with your other hand). 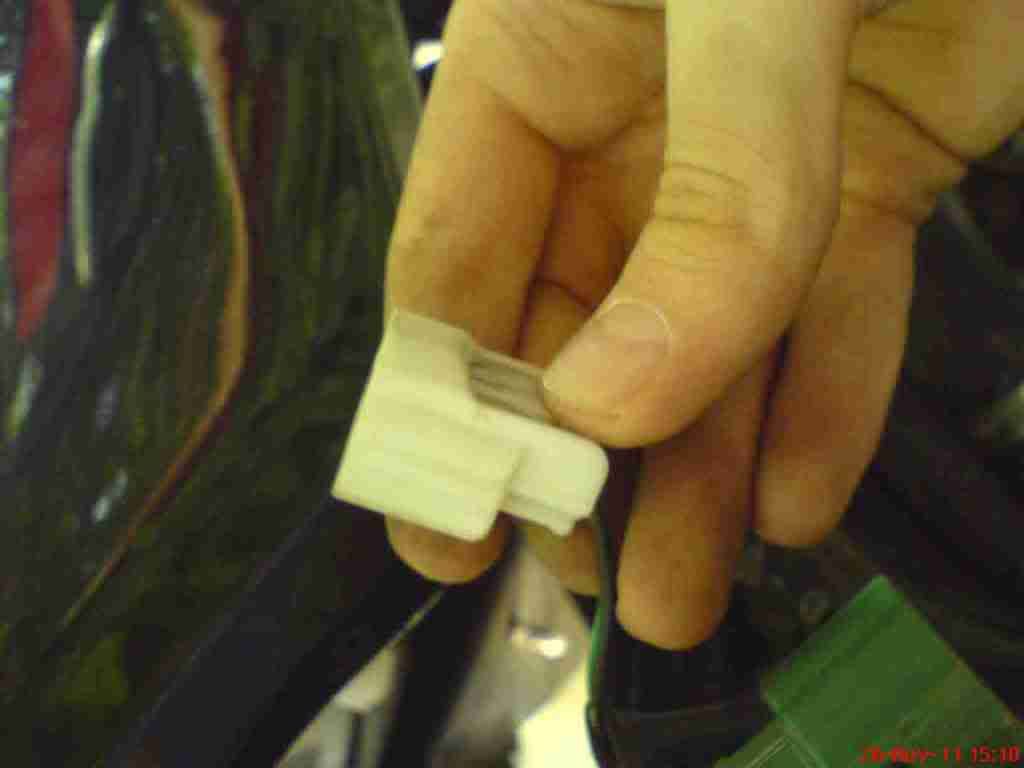 15. �the fuel hose clamp� 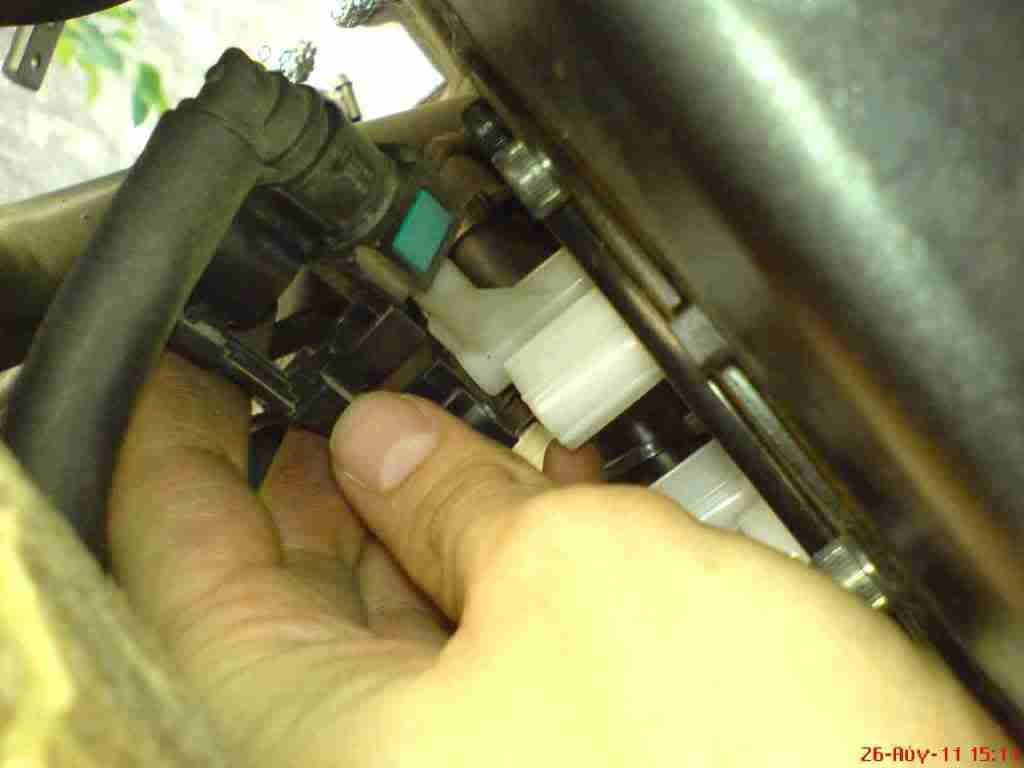 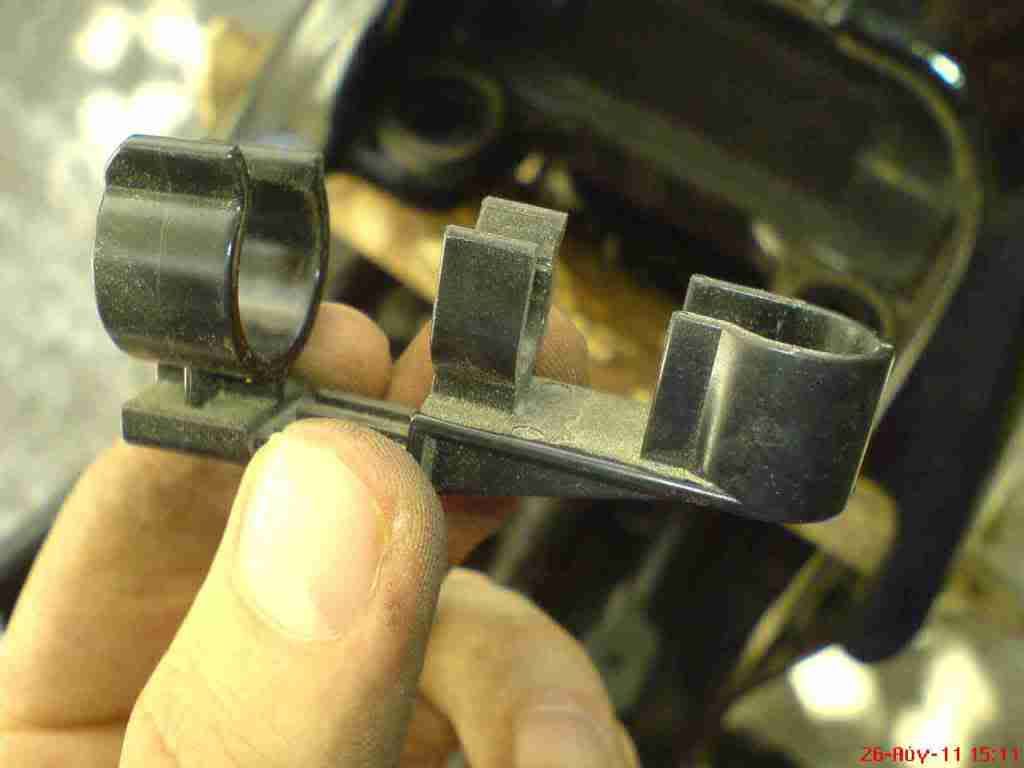 16. �the fuel hose (press the green clips and pull the hose at the same time)� 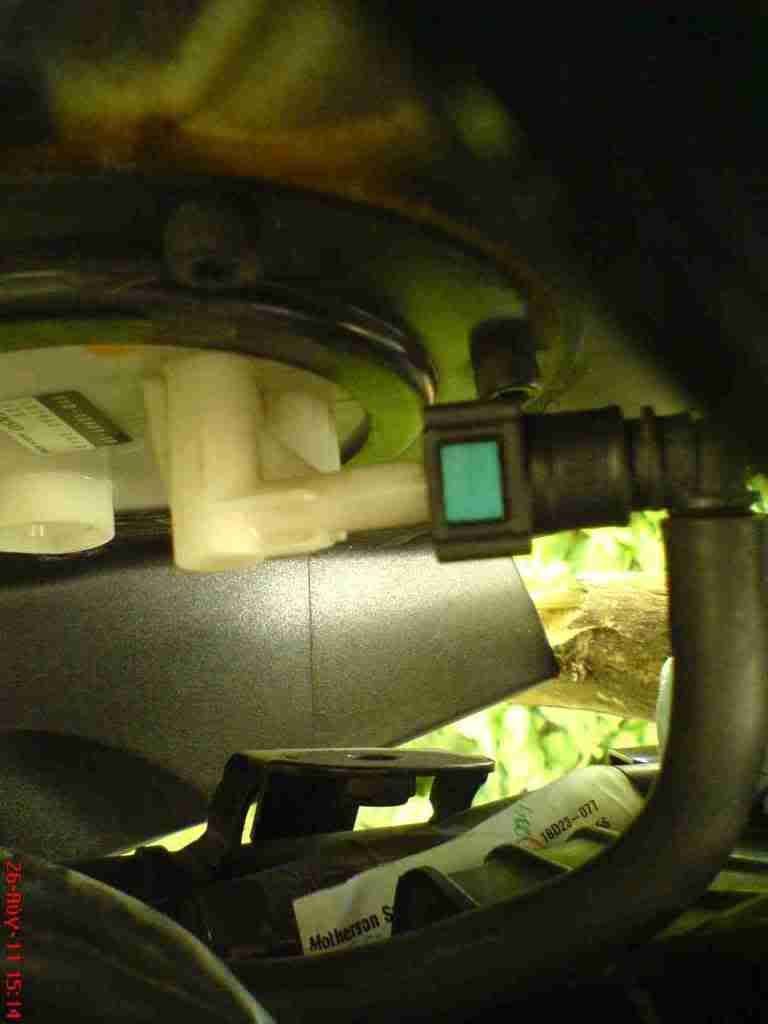 17. �(have a rag handy to collect any remaining fuel).  18. Tank removed. 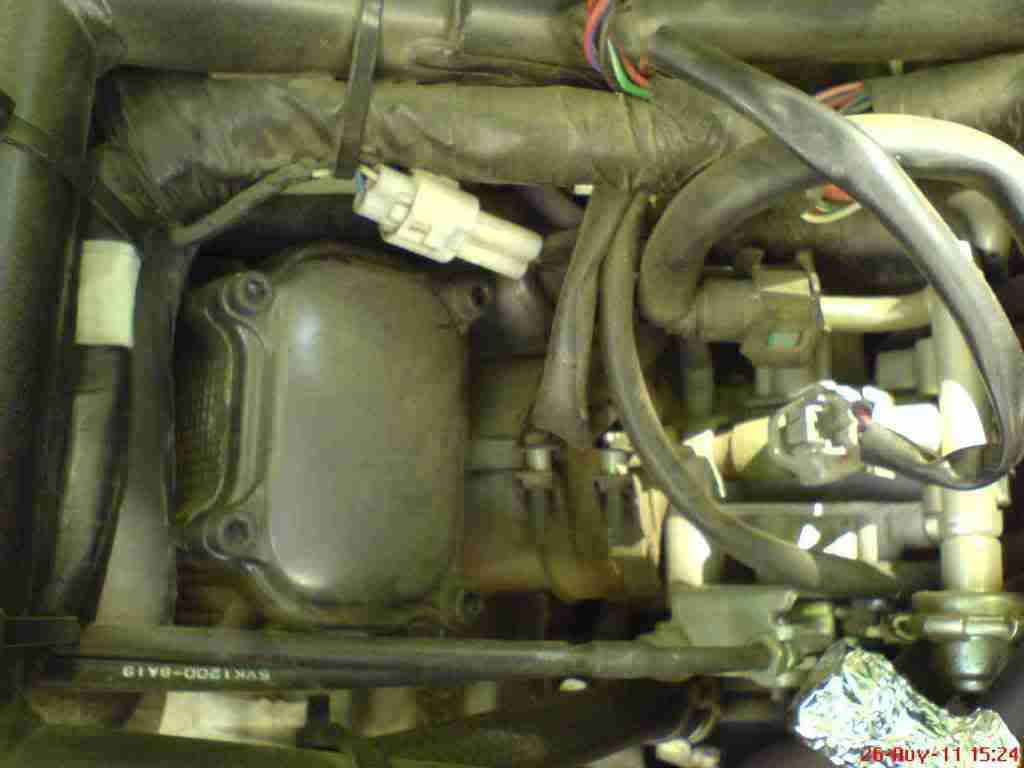 19. Then I removed the radiator covers.  20. Push the centre pin in to remove the trim clip. 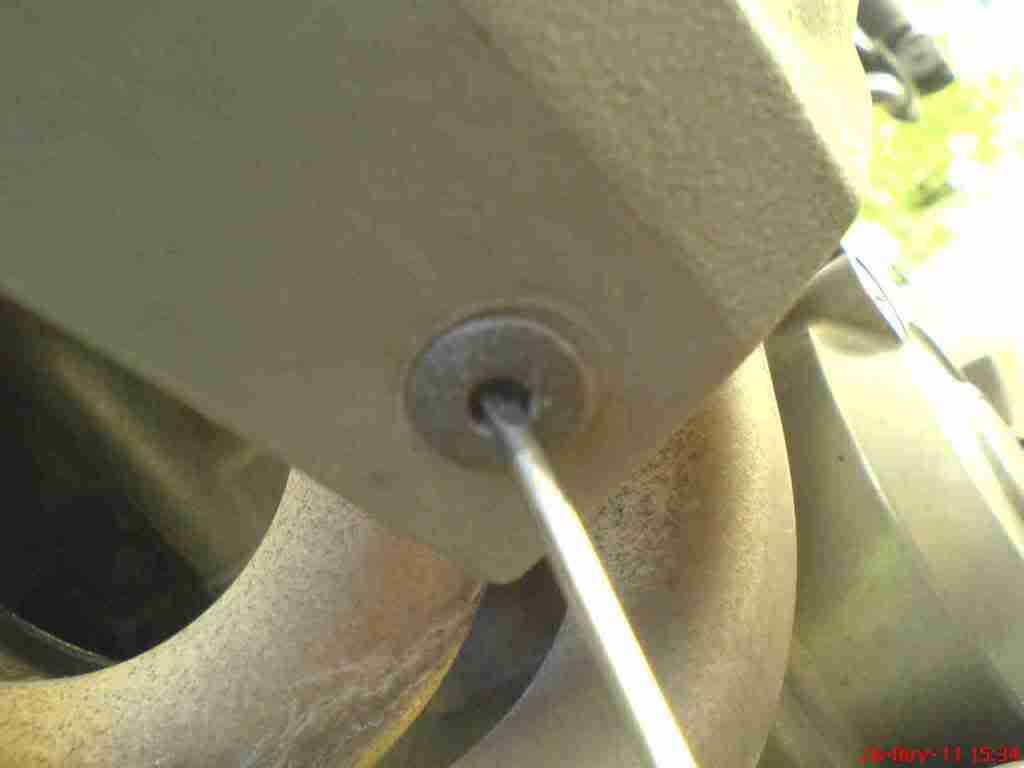 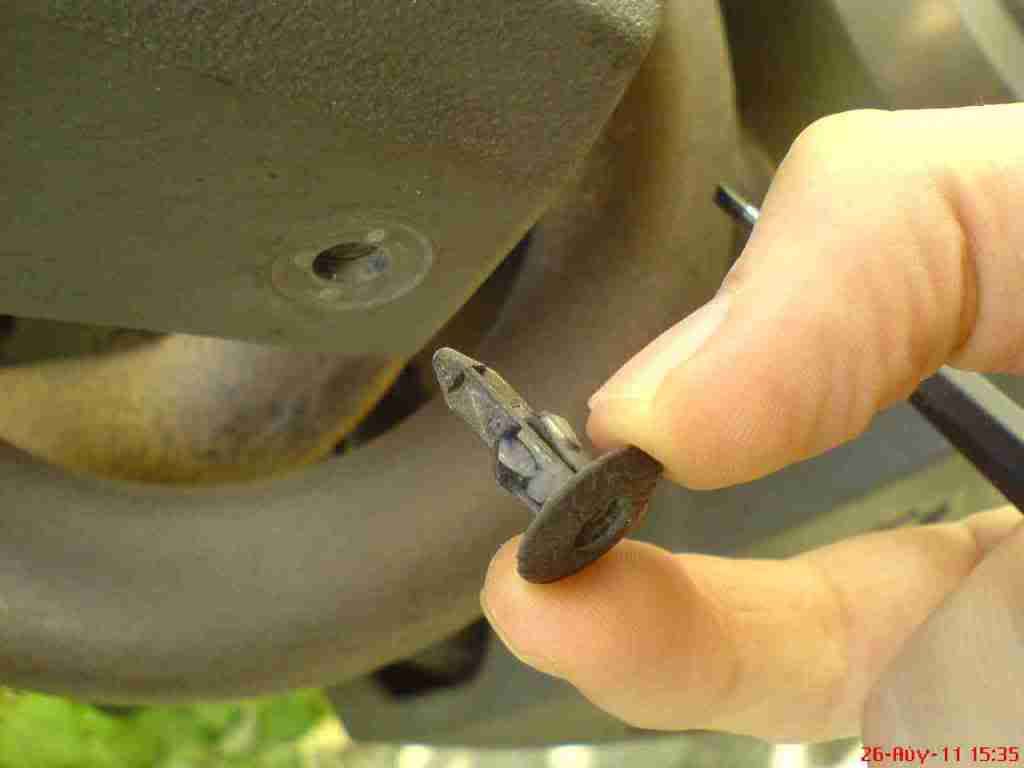 21. To reinstall it, just push the pin conversely so it peeps from the upper side of the clip. Then fit the clip and push the centre pin in. 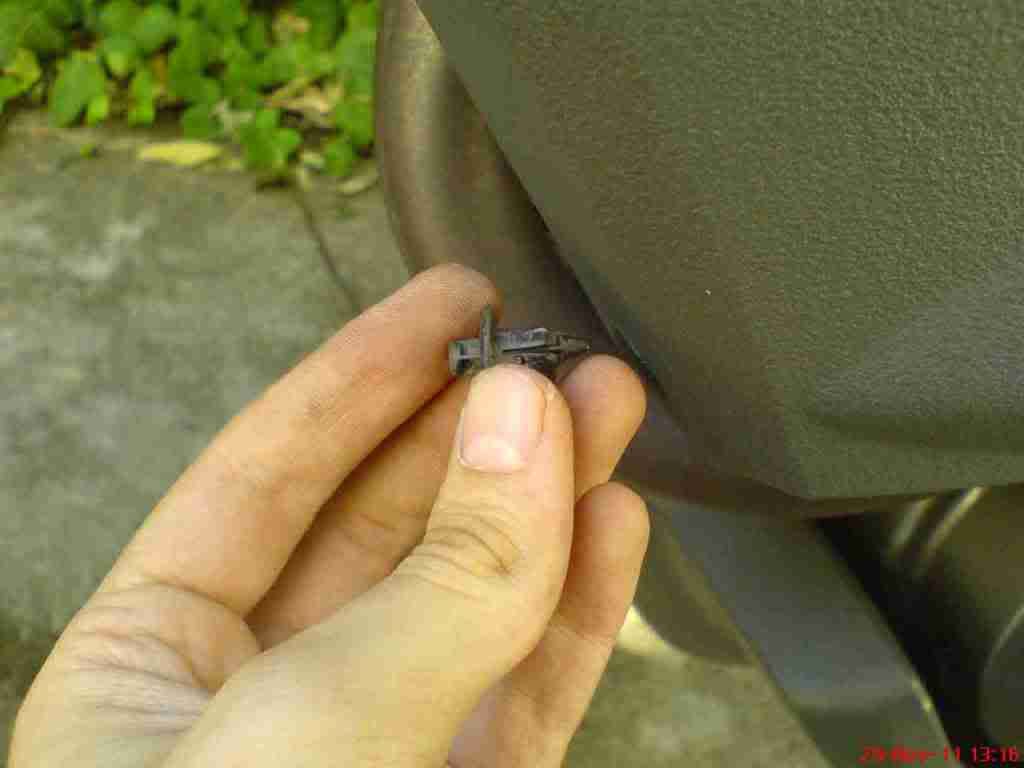
|
|
#
4
29-08-11, 19:00
|
|||
|
|||
|
22. I partly removed the radiator so as to have access to the exhaust tappet cover.
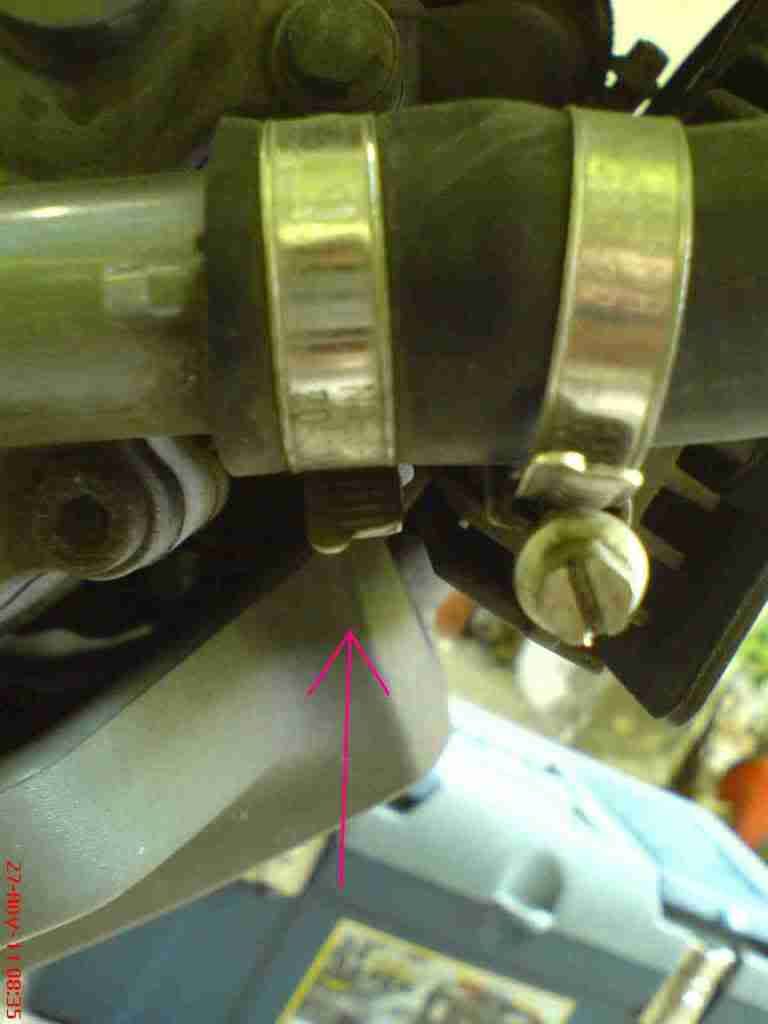
23. I undid the screws… 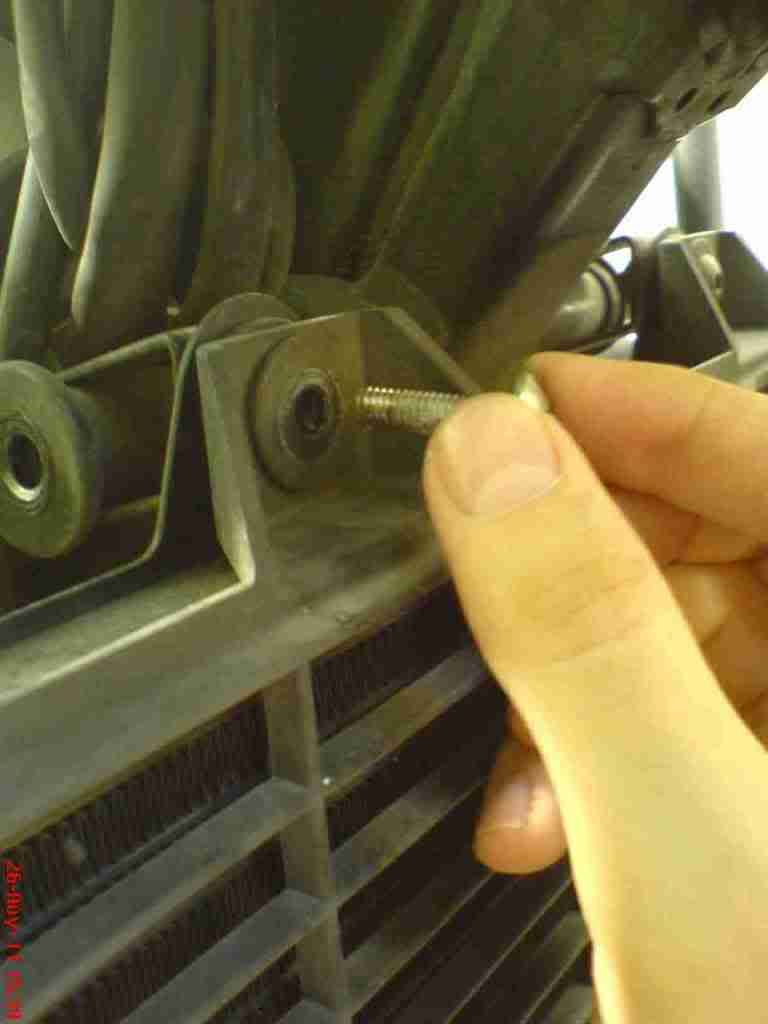 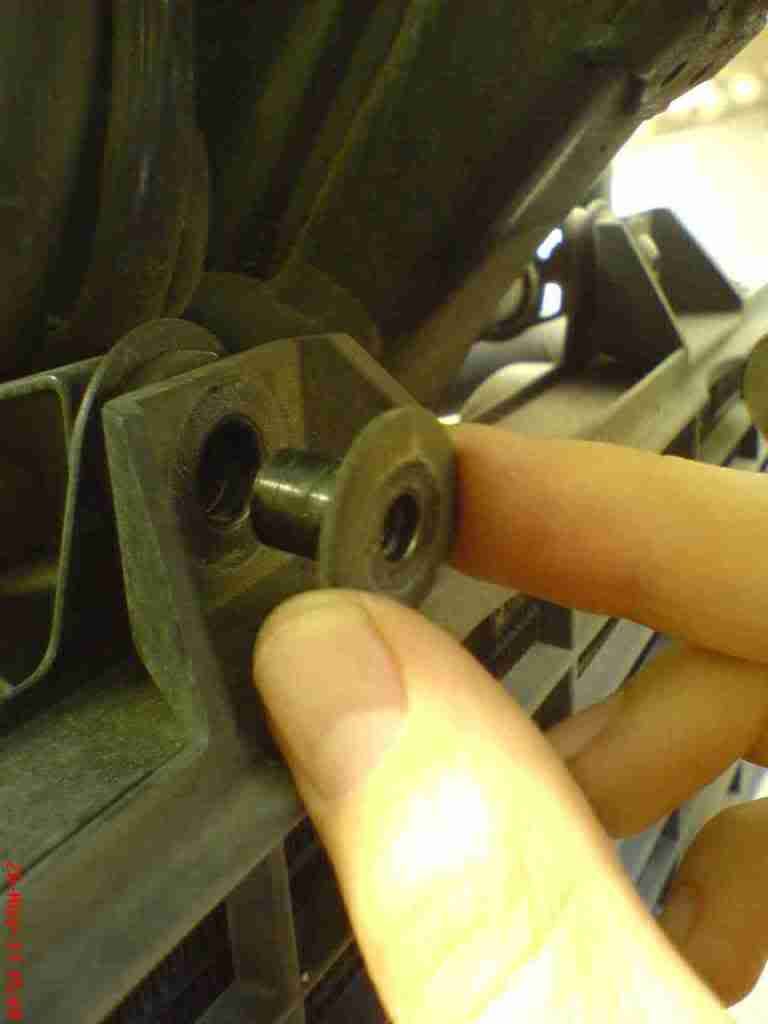 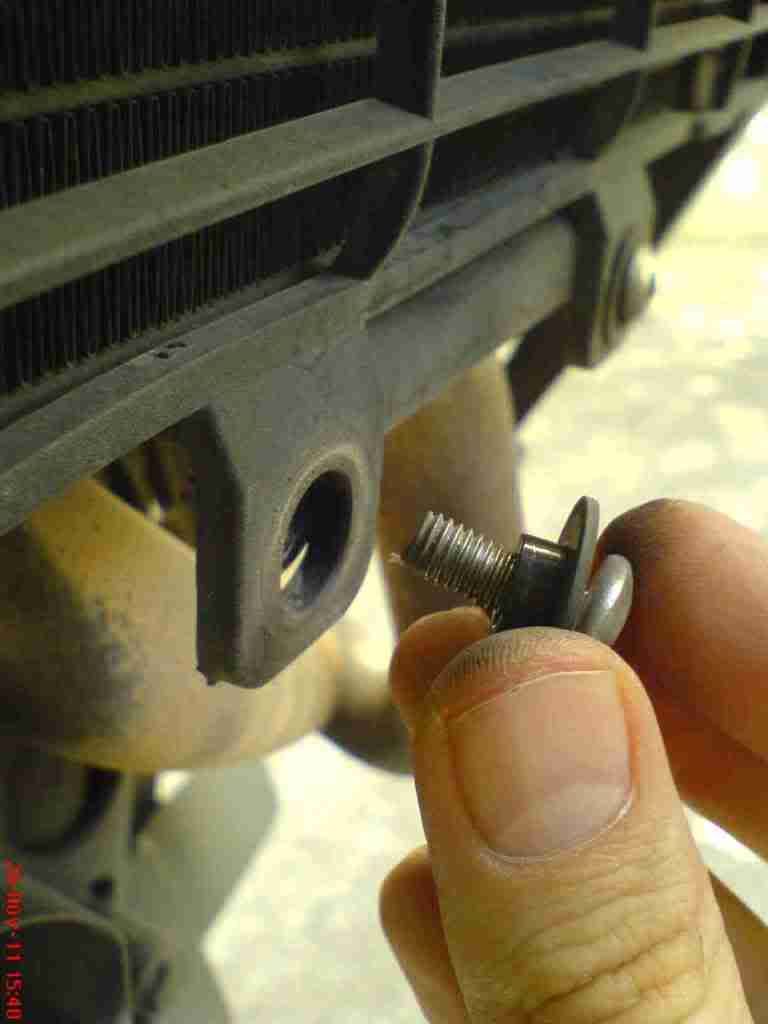 24. …removed the grille… 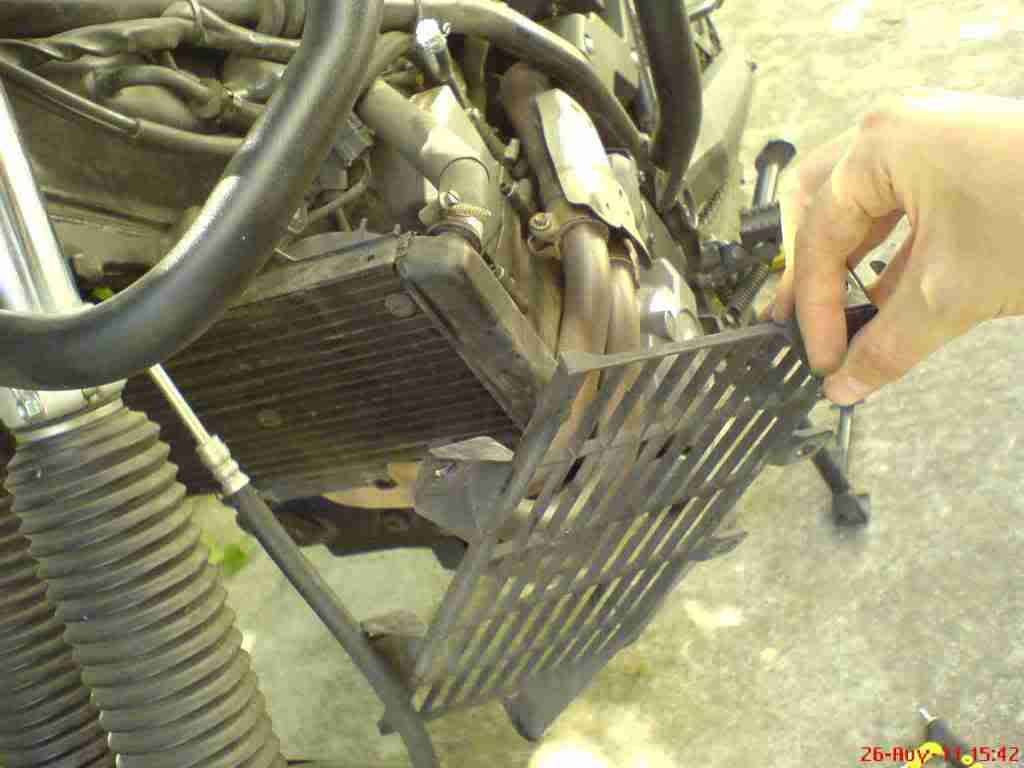 25. …disconnected the fan motor coupler… 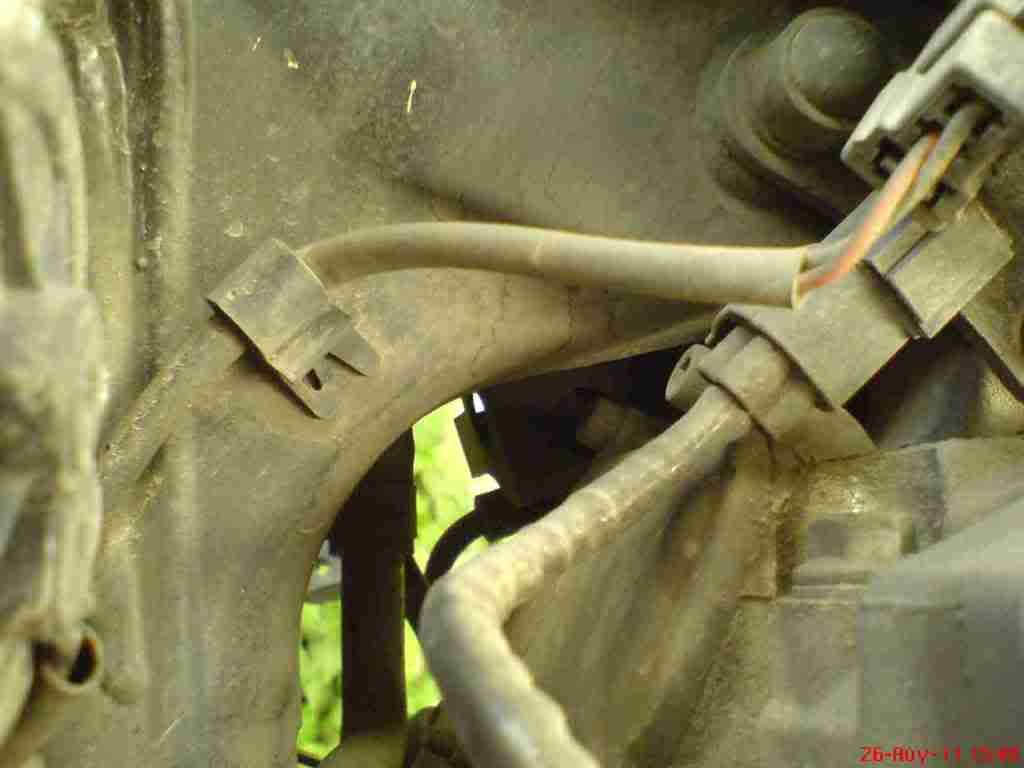 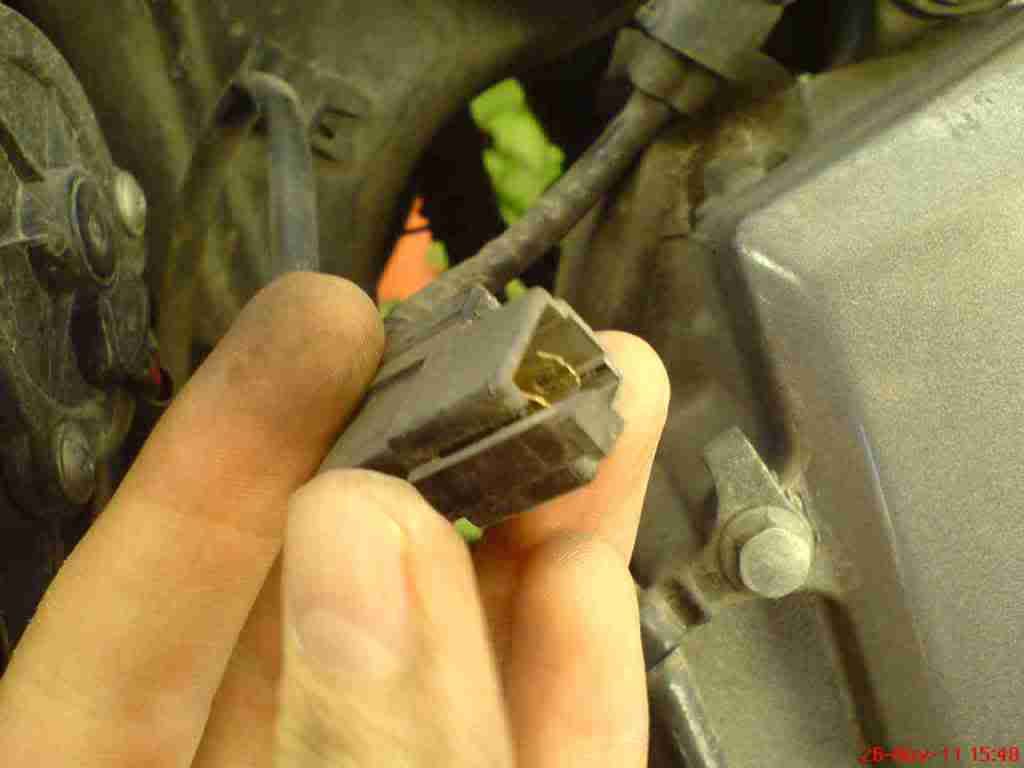 26. This step is optional. I detached the fan from the radiator to clean the crud off of it. 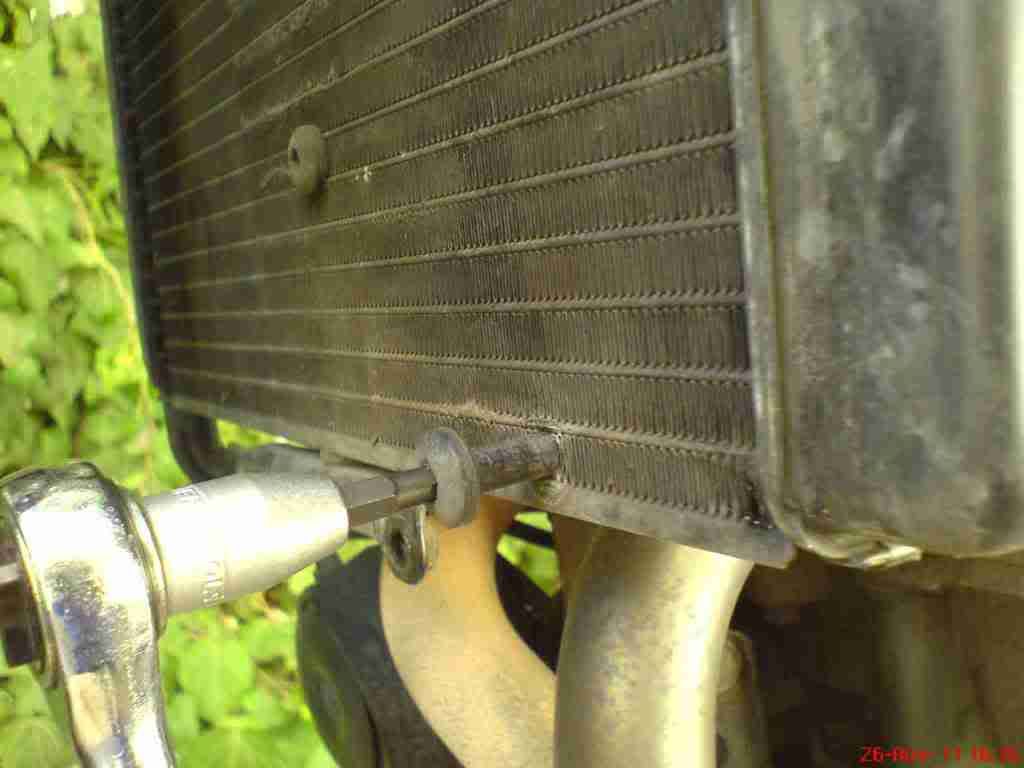 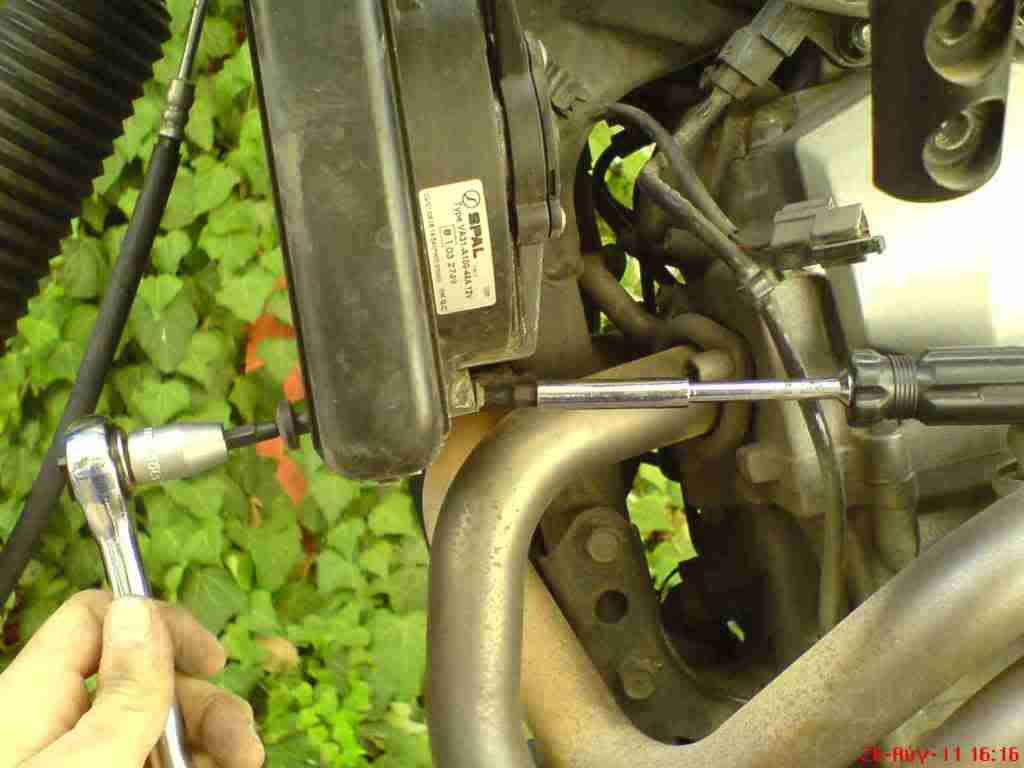 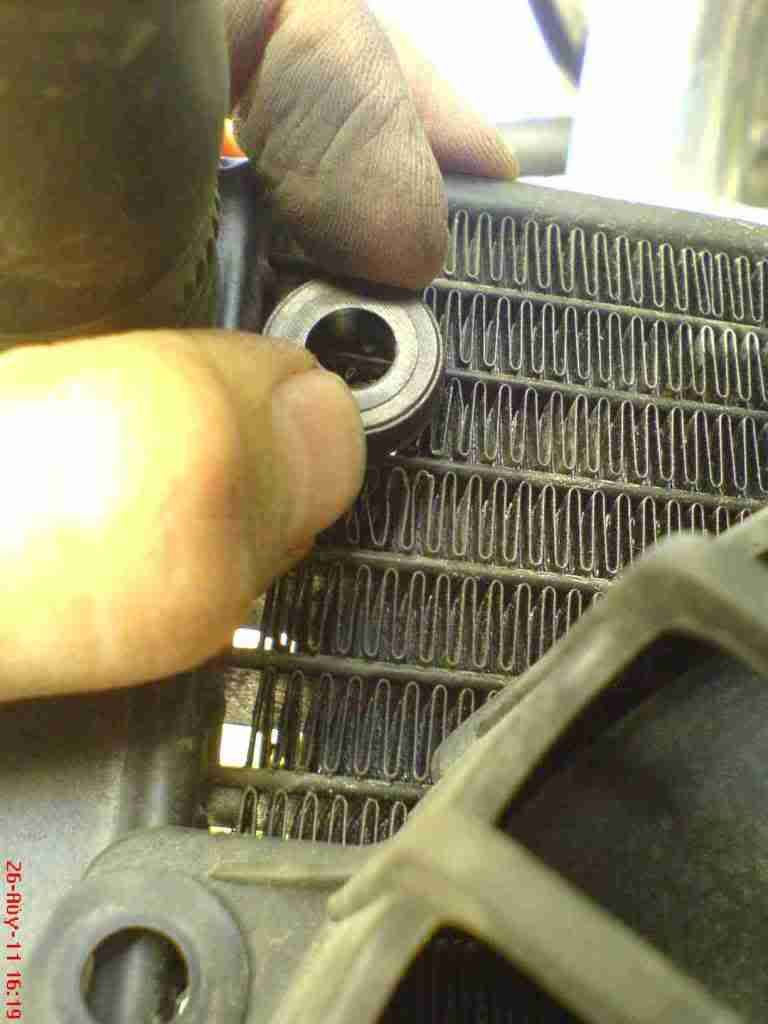 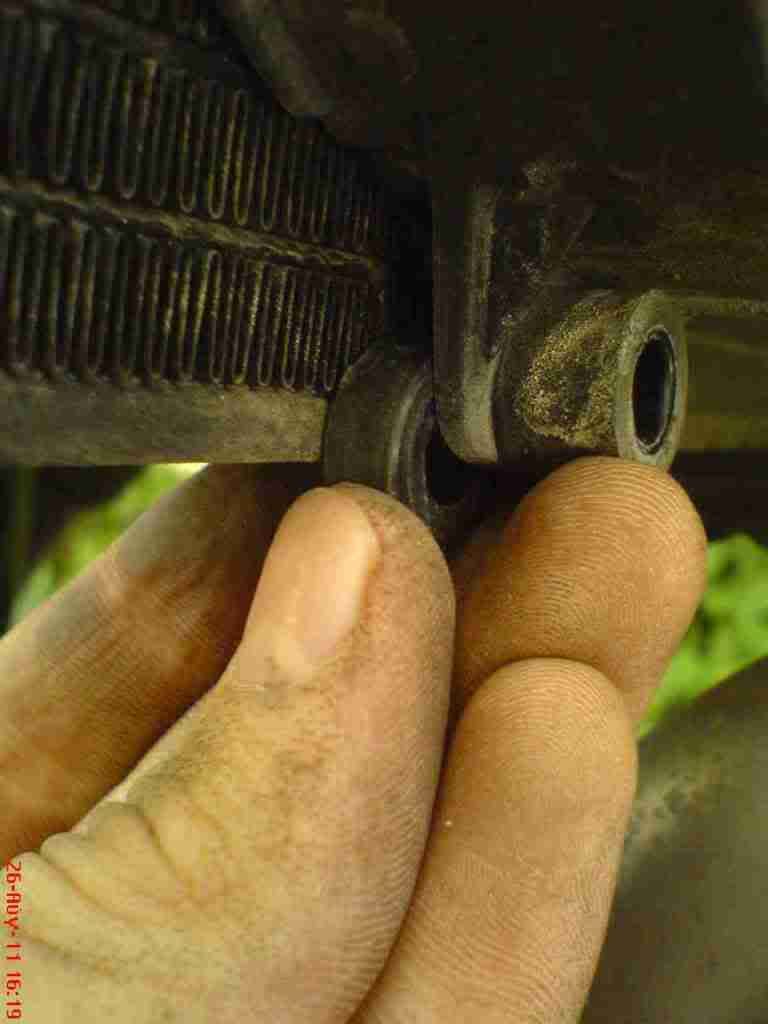   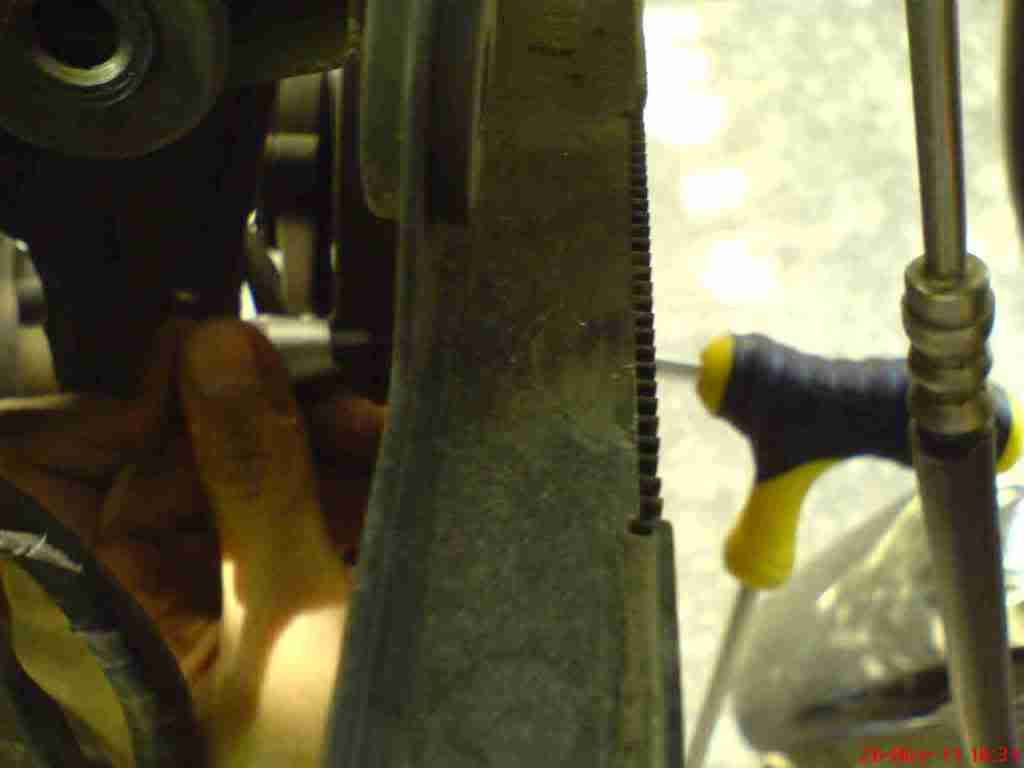 27. During the whole process I was storing all screws, bolts, etc, in this little box. 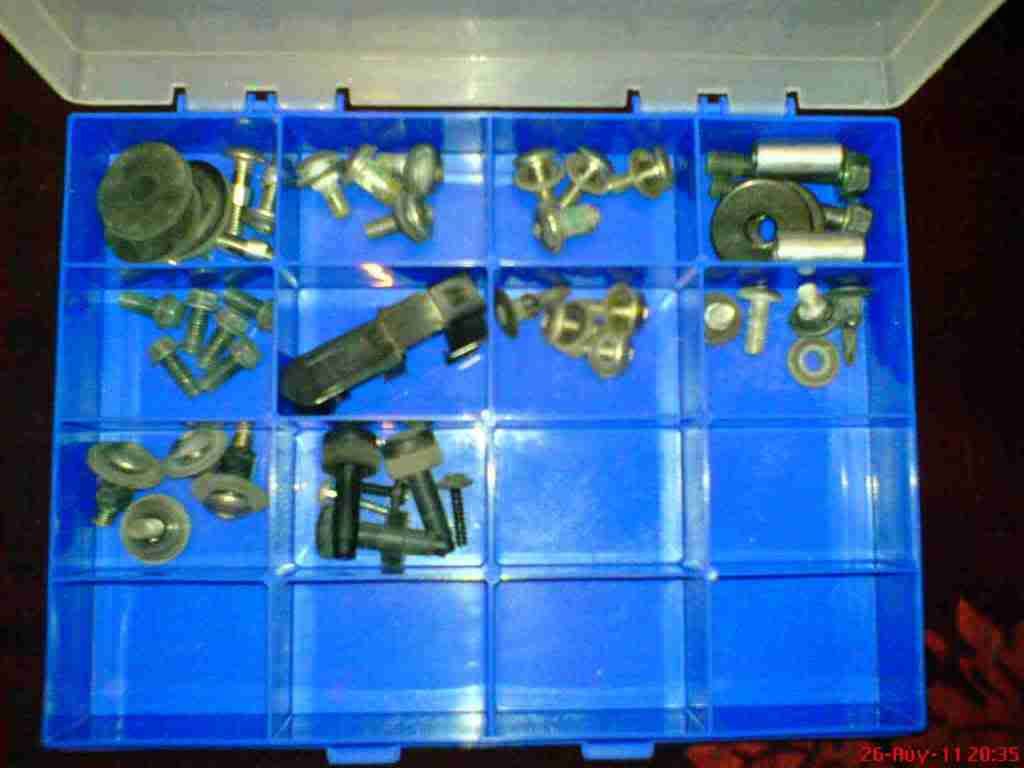 28. Draining the coolant was the only way to get the radiator out of the way. 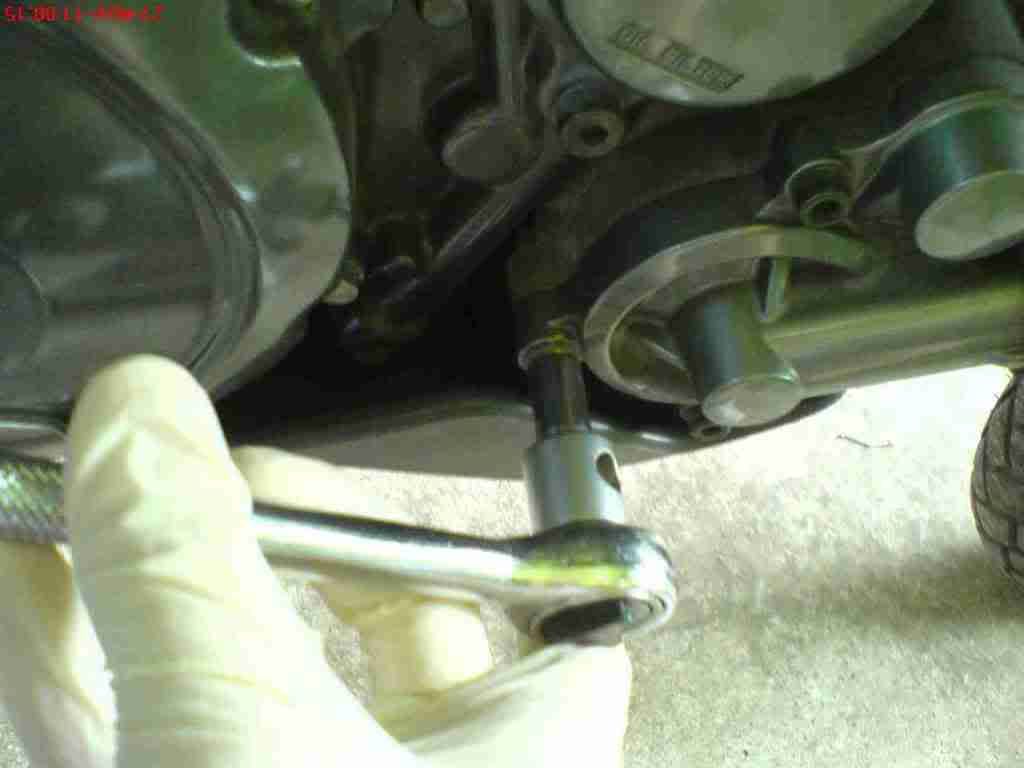 29. After draining the circuit, I was able to remove these 2 hoses. 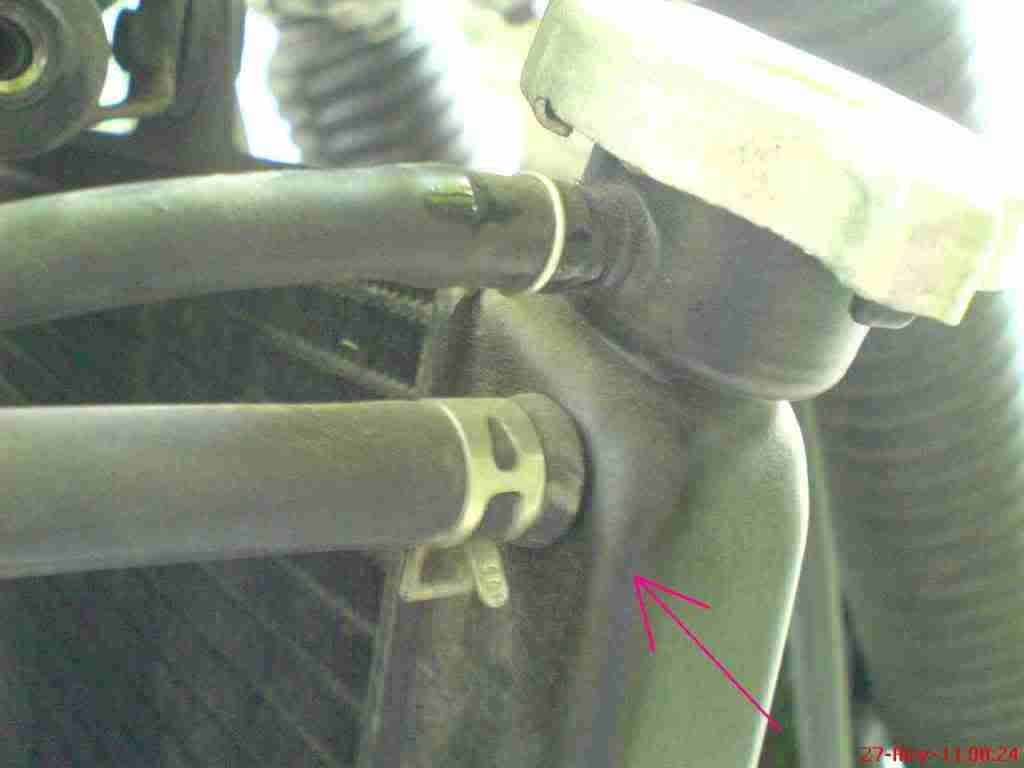
 Last edited by zeiss11; 29-08-11 at 21:14. |
|
#
5
29-08-11, 19:12
|
|||
|
|||
|
30. Spark plug is out.
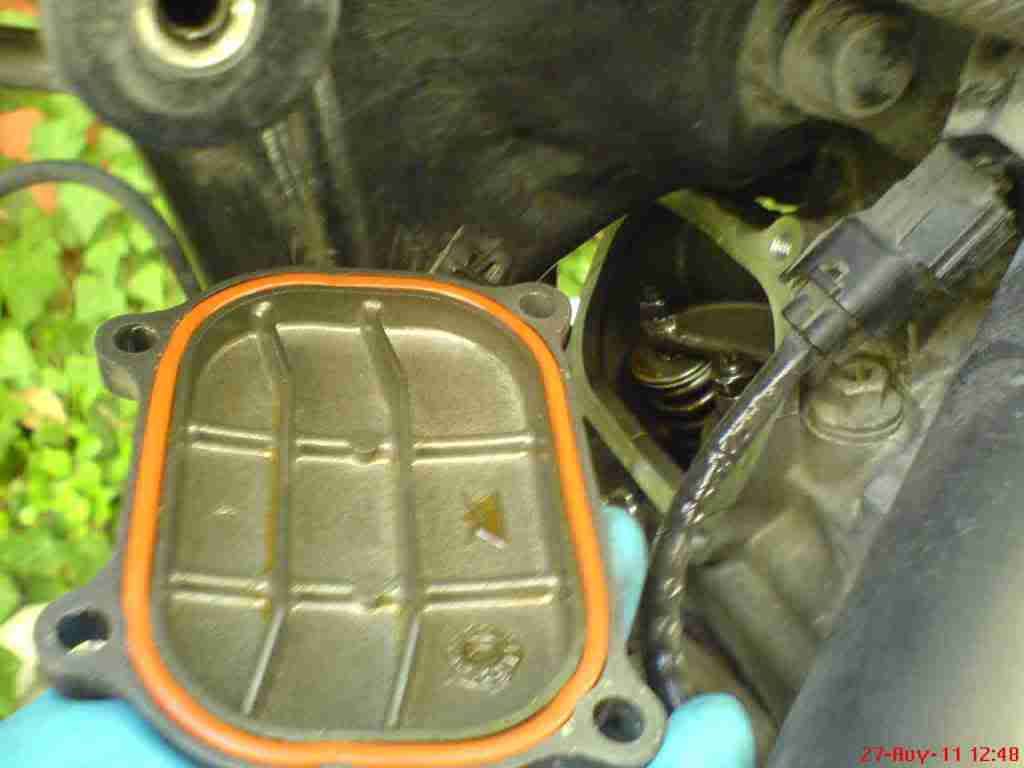
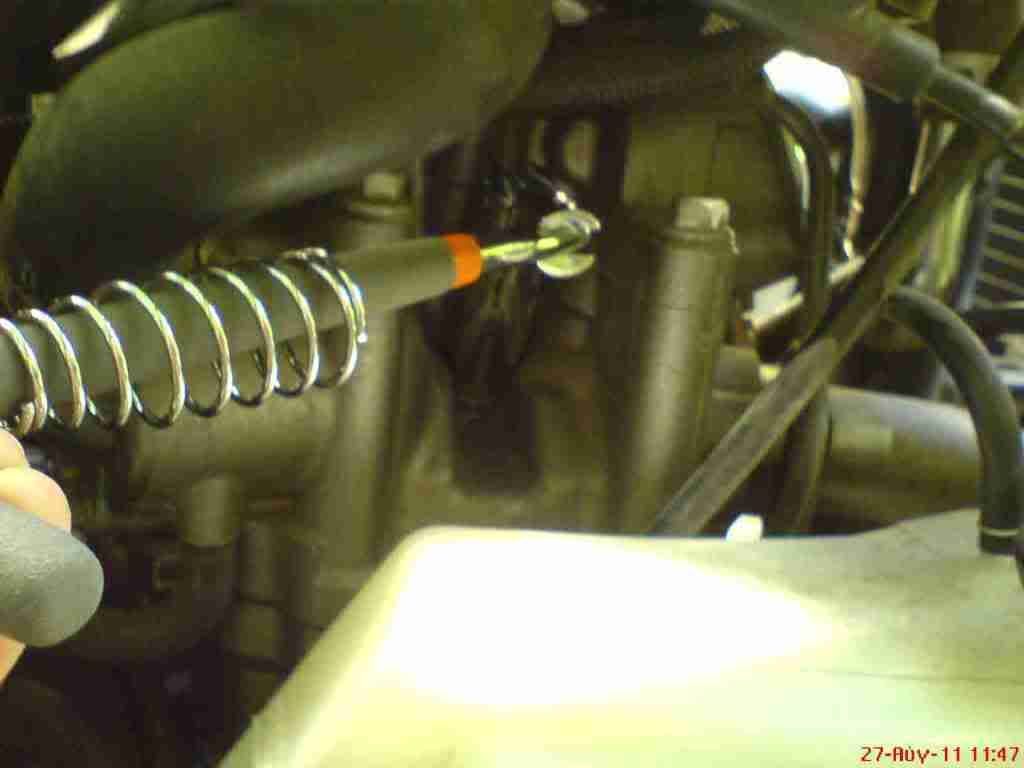  31. I removed the 2 accessing screws… 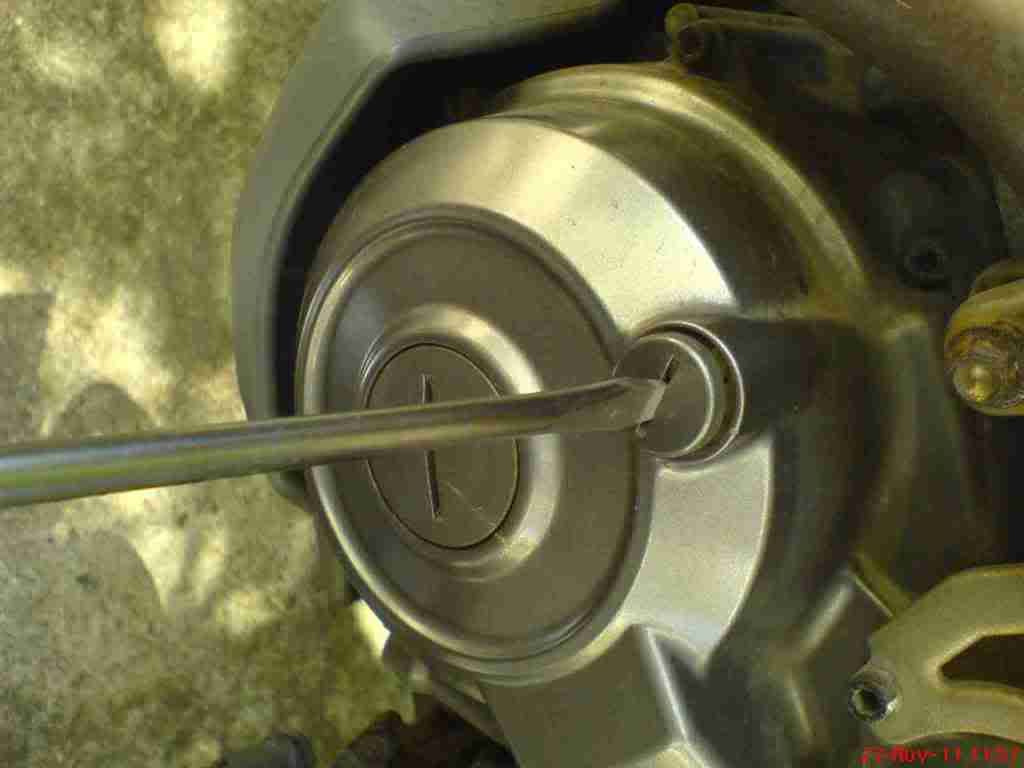 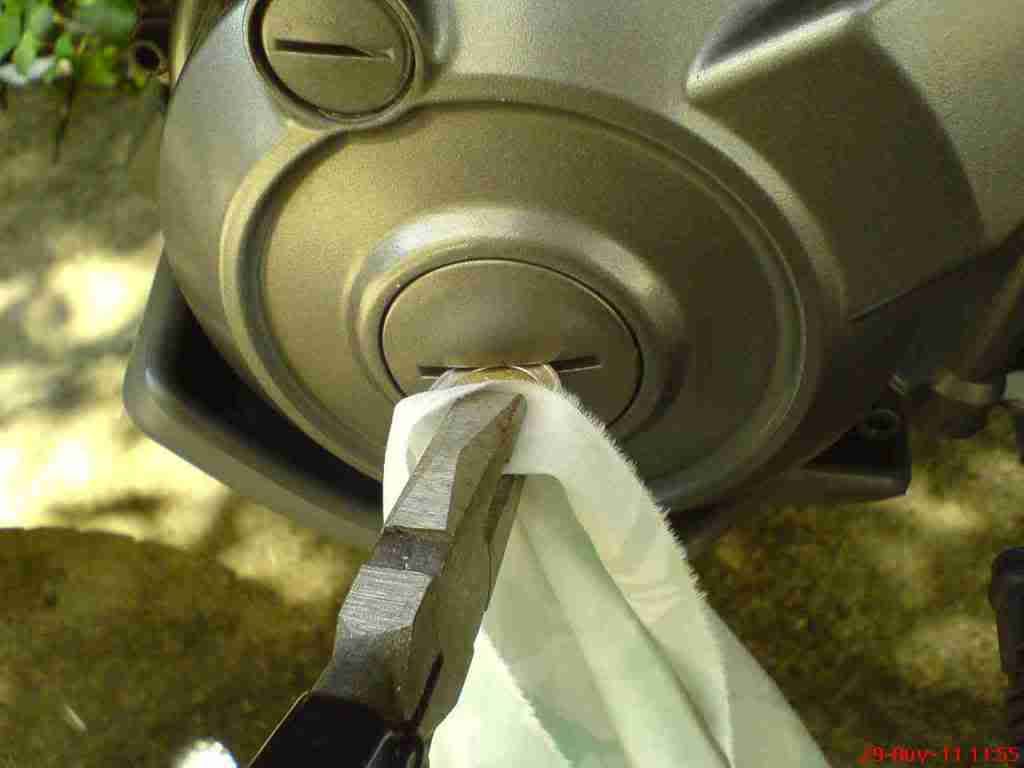 32. … (The o-rings were in good condition)... 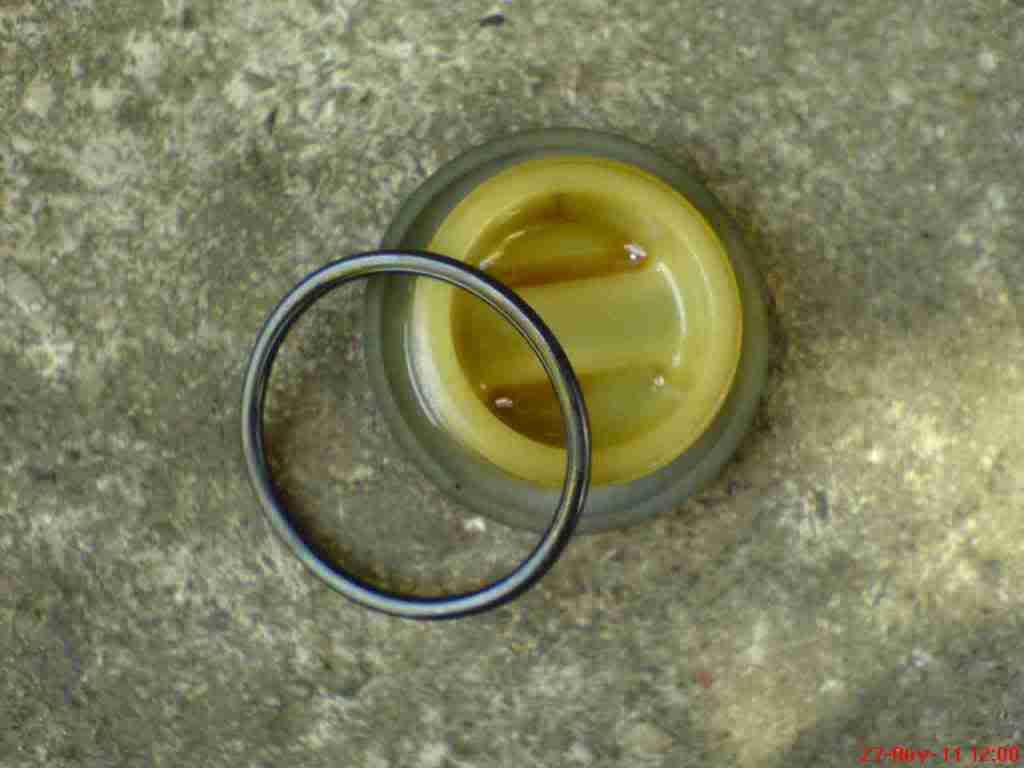 33. …and the camshaft sprocket cover.  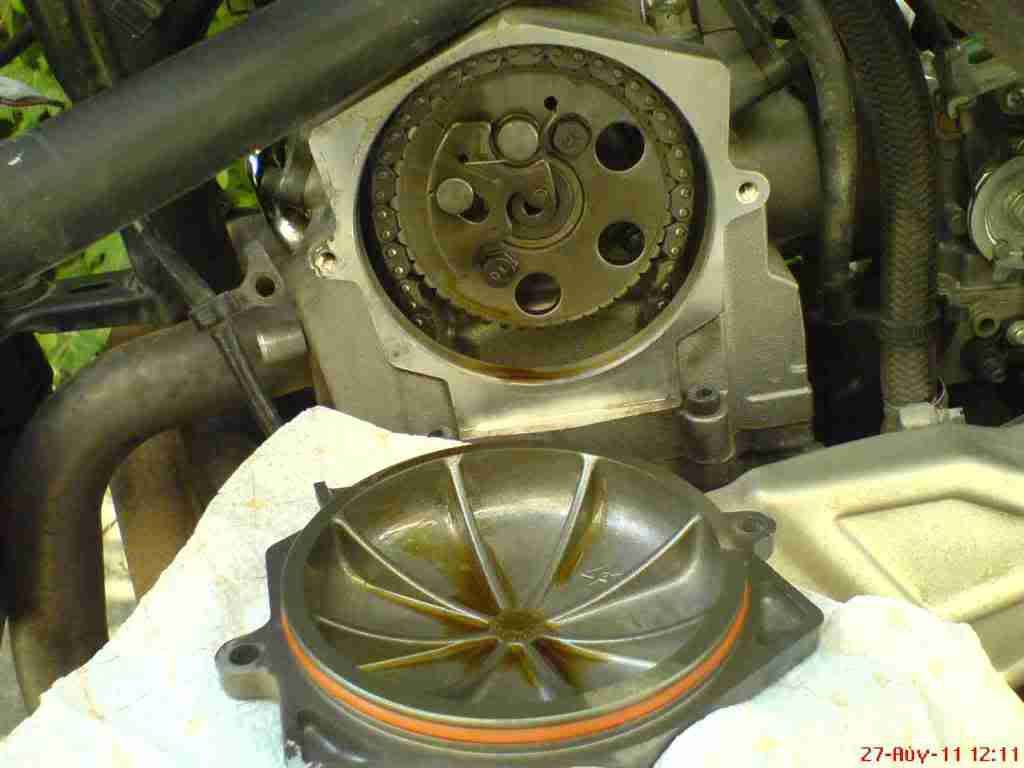 34. I turned the crankshaft counterclockwise by using a 22mm hex socket (the image is from the OEM manual, because I forgot to take a photo). I continued turning the crankshaft until the “I” mark (a) aligned with the stationary pointer on the magneto cover (b). 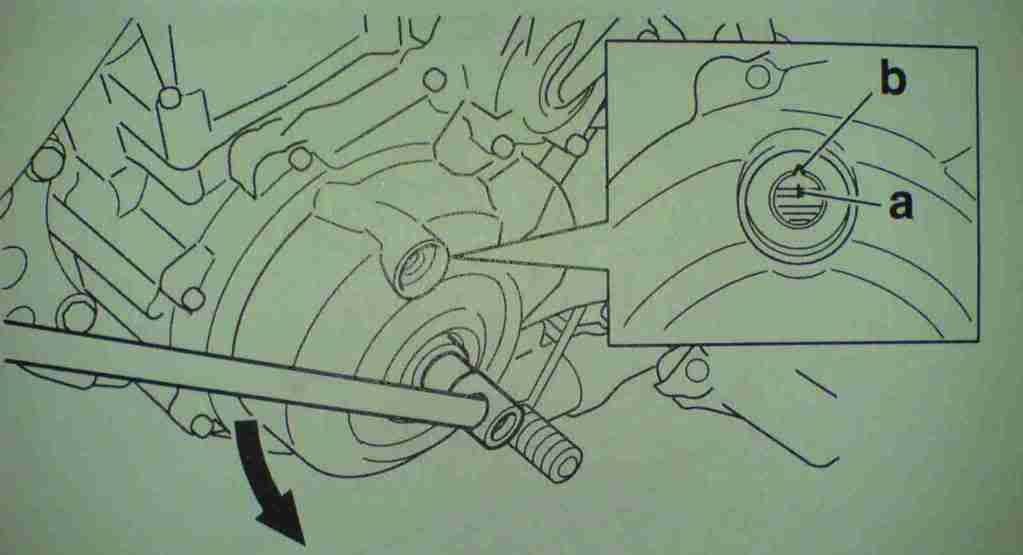 35. On the camshaft sprocket there's another “I” mark which moved at the bottom (overlap TDC of the exhaust stroke - I don't want this one)... 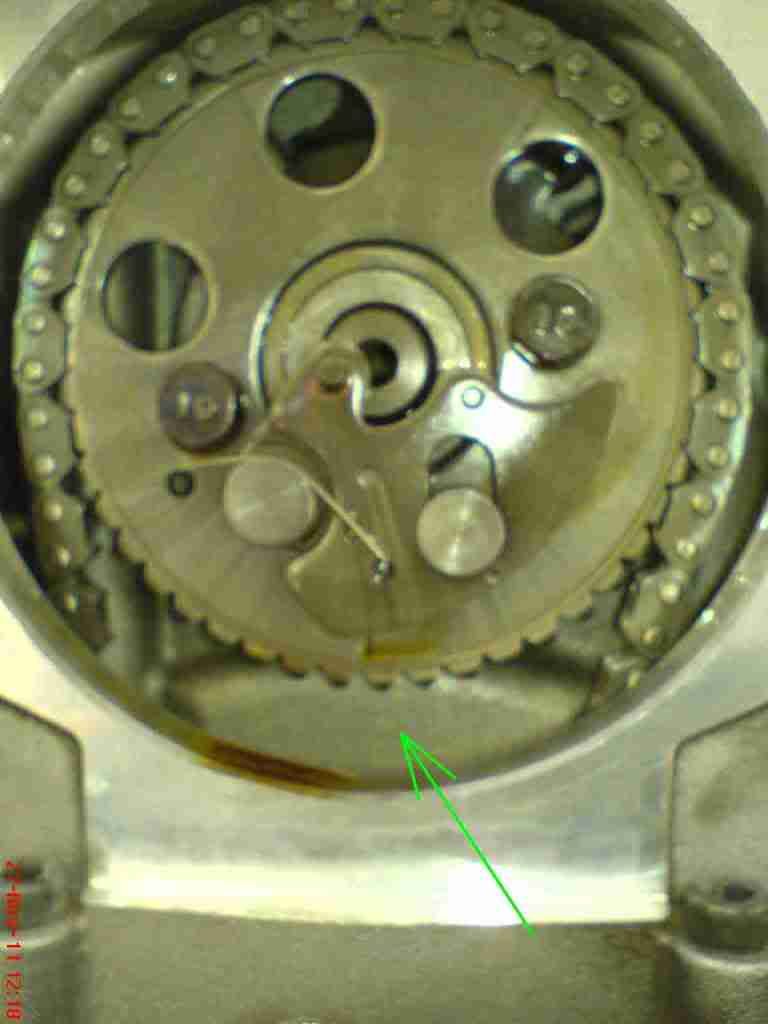 36. ...So I made another circle counterclockwise. (Do not confuse the “I” mark on the crankshaft with the “H” mark that comes just before it). 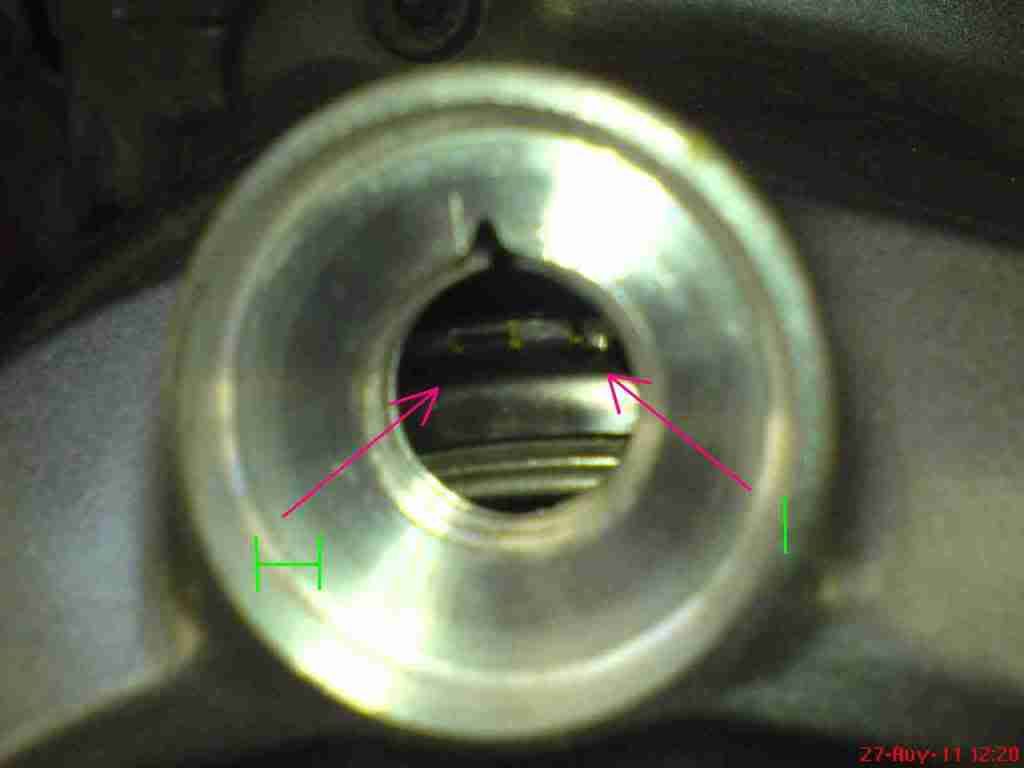 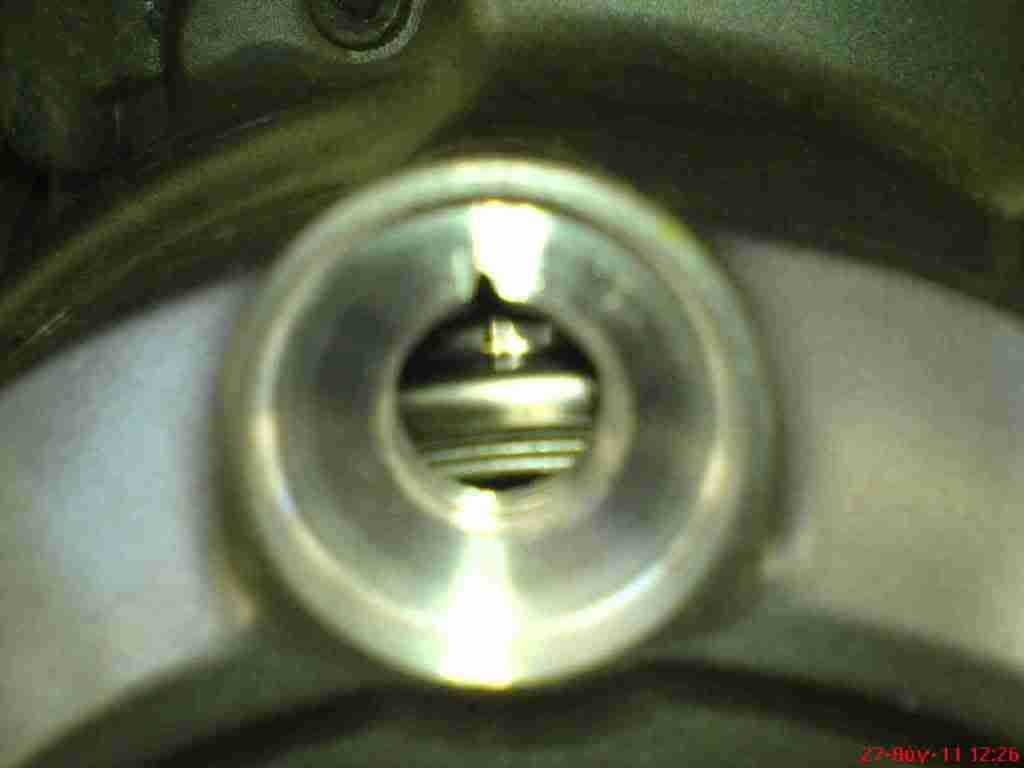 37. The piston is now at TDC (of the compression stroke), and the 4 valves are closed and ready for adjustment. 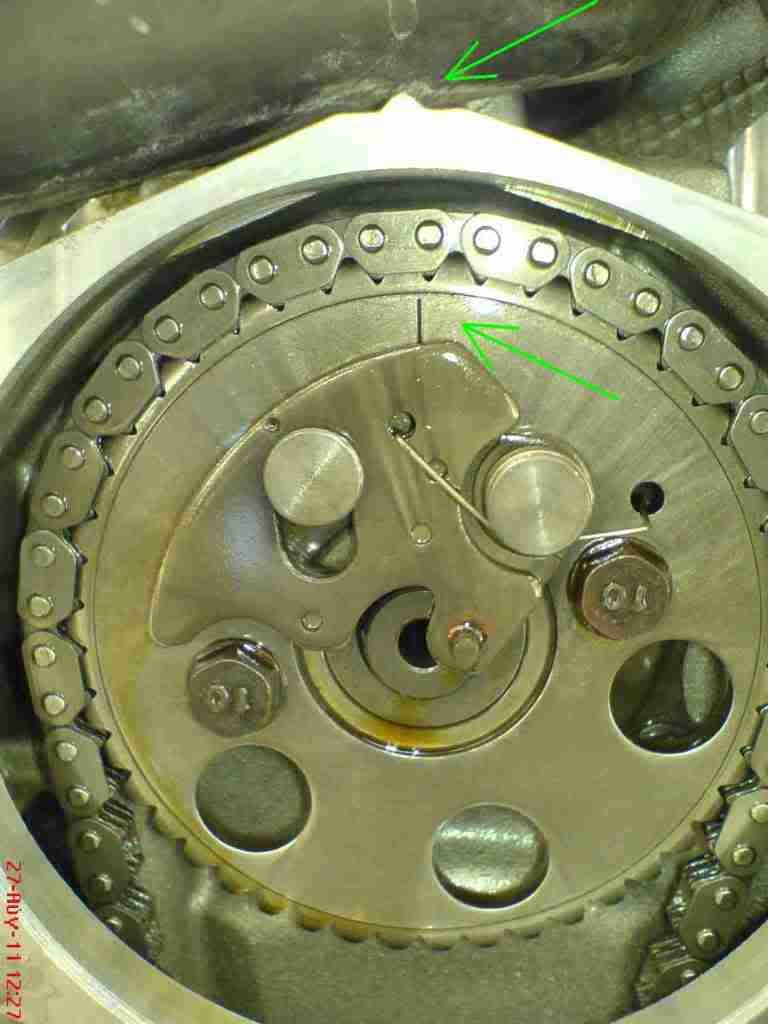 38. I removed the intake and exhaust tappet covers.. 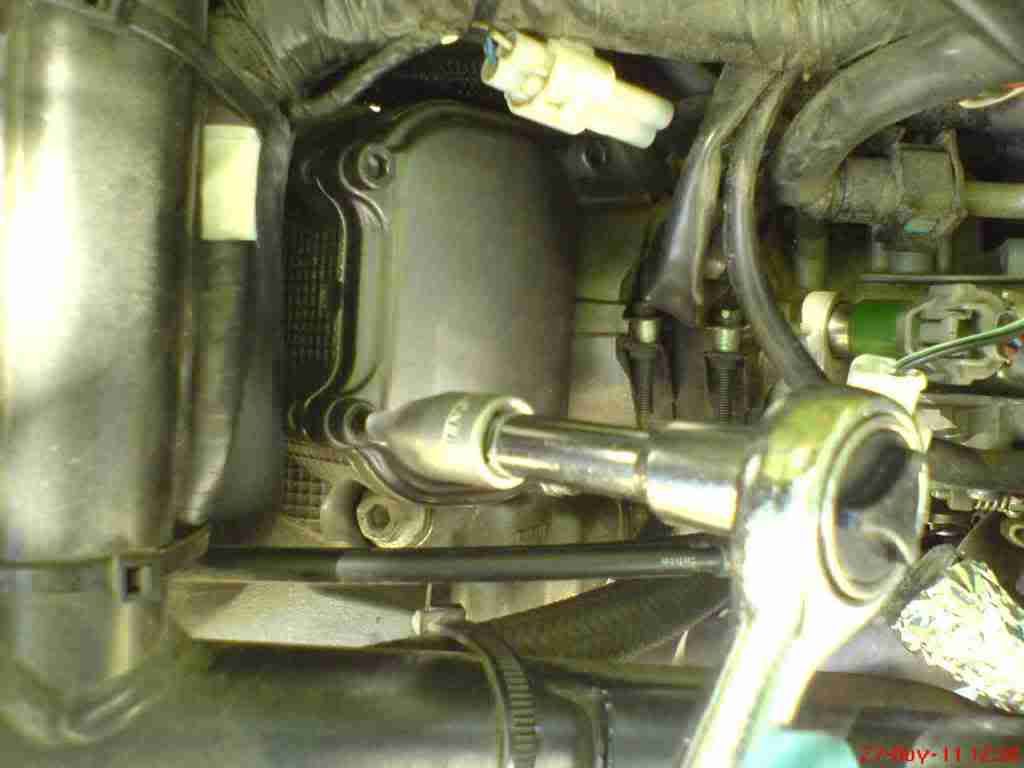 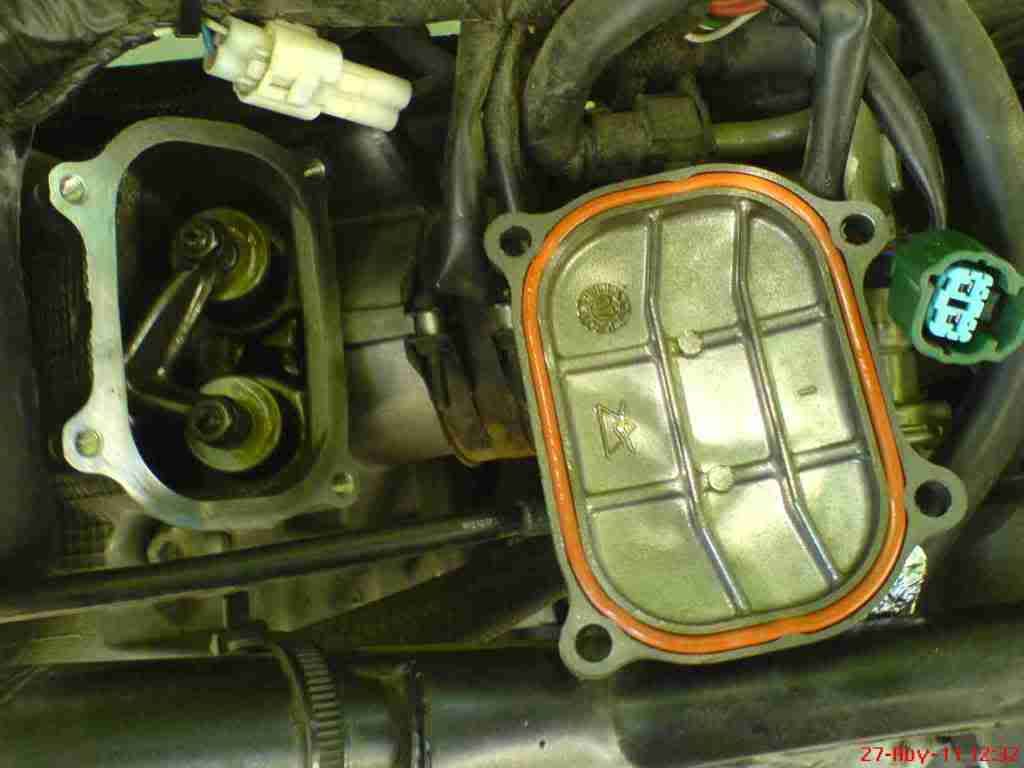 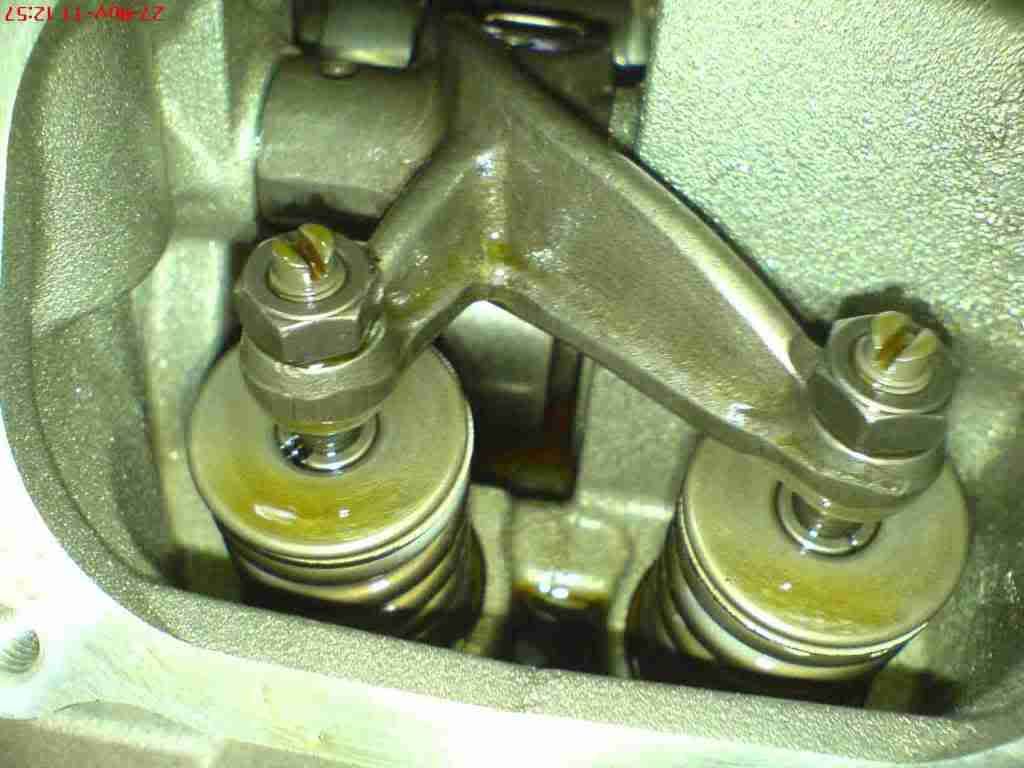 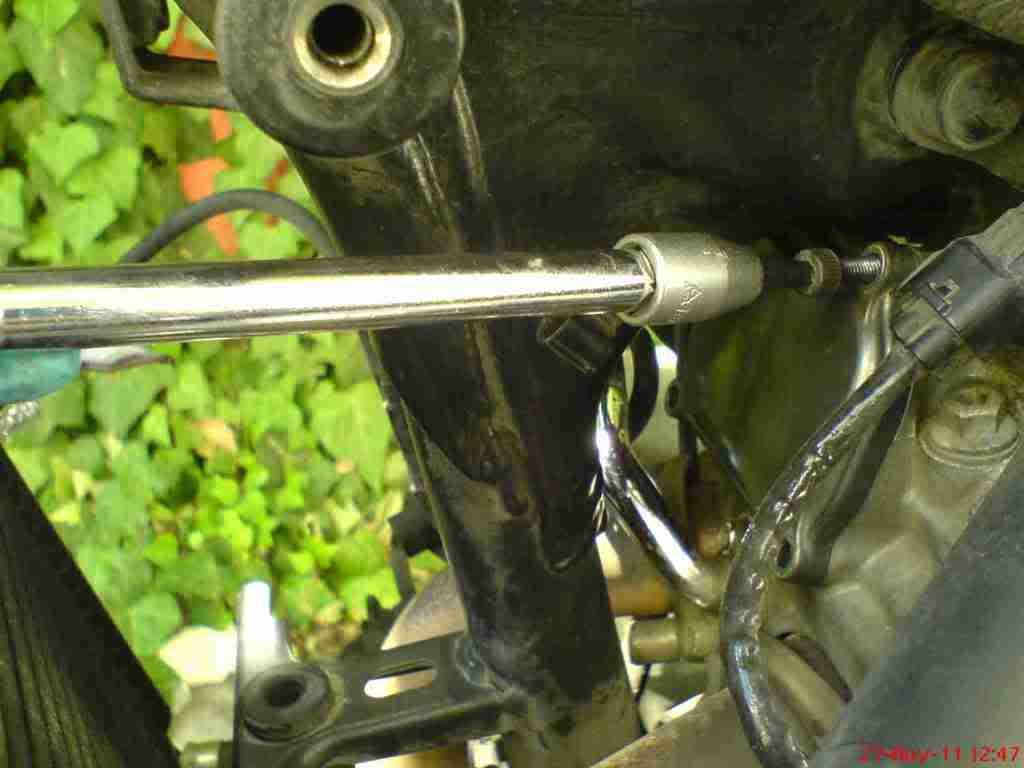
 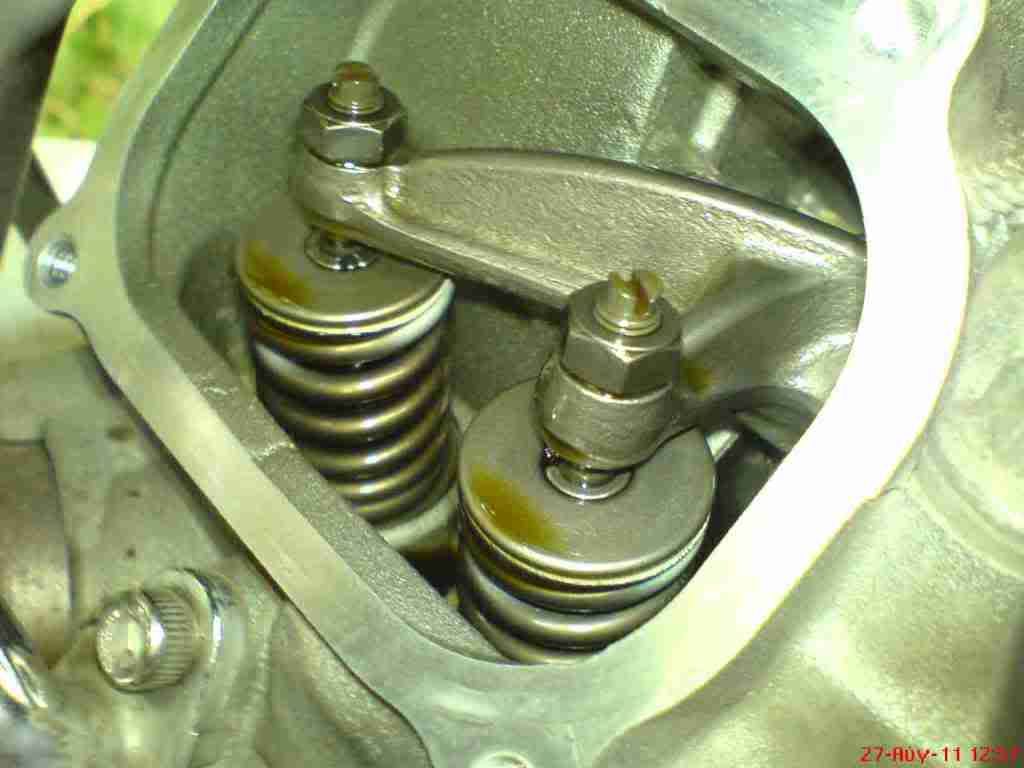 39. …and inserted the feeler between the adjusting screw and the valve. 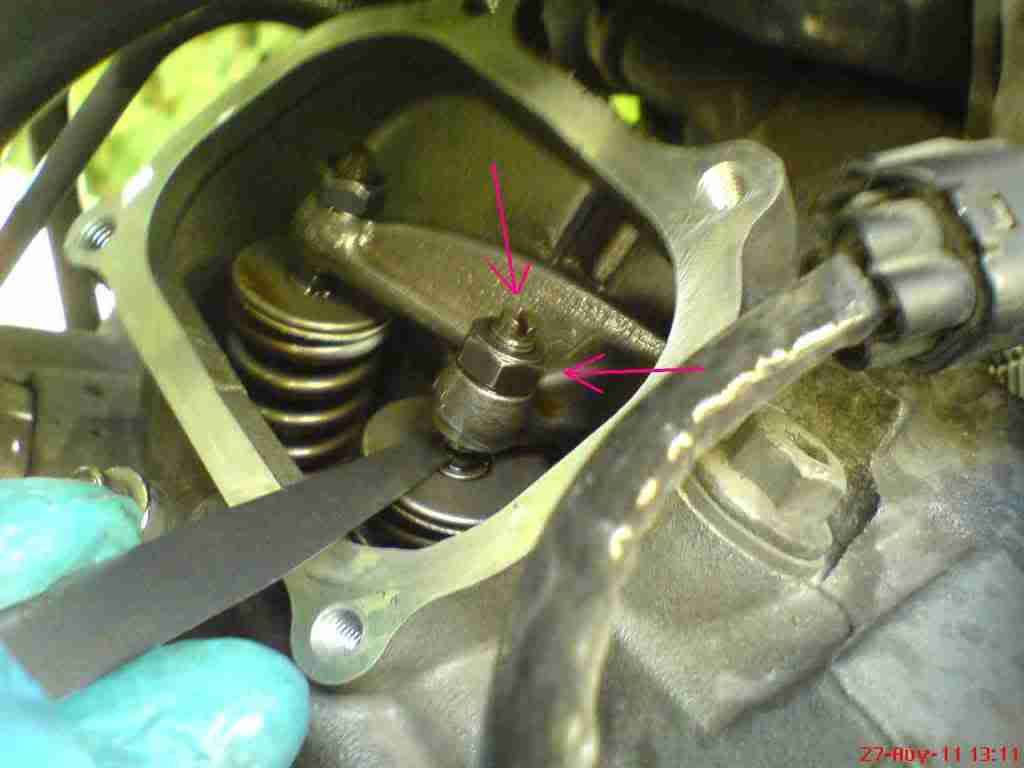 Last edited by zeiss11; 04-09-11 at 18:17. |
|
#
6
29-08-11, 19:19
|
|||
|
|||
|
40. (The intake valves were 0,08 mm, while the exhaust valves were 0.13 mm. Way out of specification. My previous mechanic said he had adjusted the valves at the 10k service, but I think he was lying. Probably he had adjusted only the intake ones).
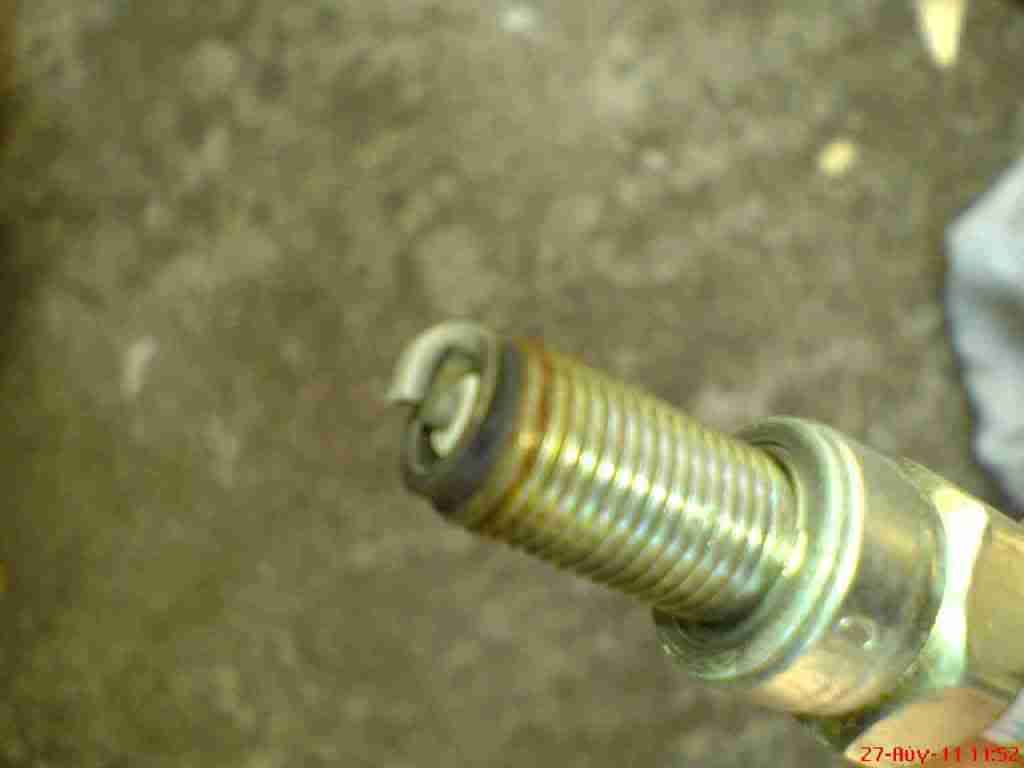
41. I slackened the locknut and turned the adjusting screw using a tiny wrench -because no screwdriver could fit in the exhaust valves area- until the gap was 0.11 mm for the intake and 0.18 mm for the exhaust valves. I held the screw to prevent it from moving and tightened the locknut using a torque wrench for the intake valves and my intuition (!) for the exhaust ones. I hope they don’t become loose after 50 kms. 42. For the peace of mind and although the old o-rings were in good condition, I fitted new ones. (The new is on the left side). 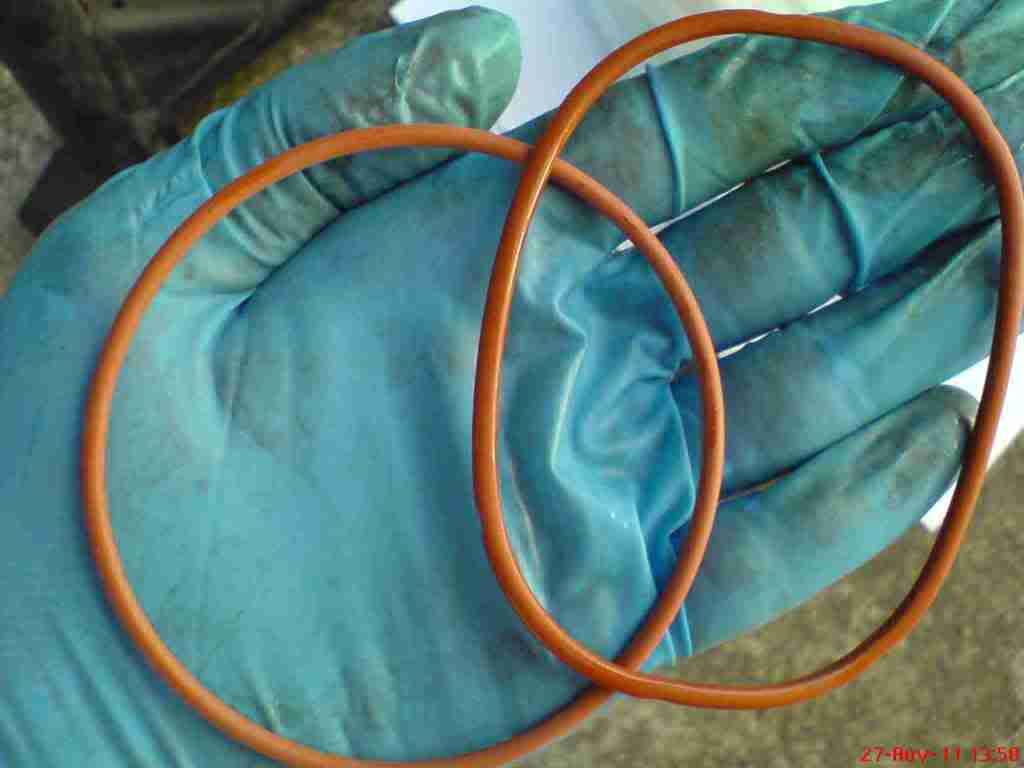 43. :tenere:   44. I measured the gaps once again and reinstalled the covers… 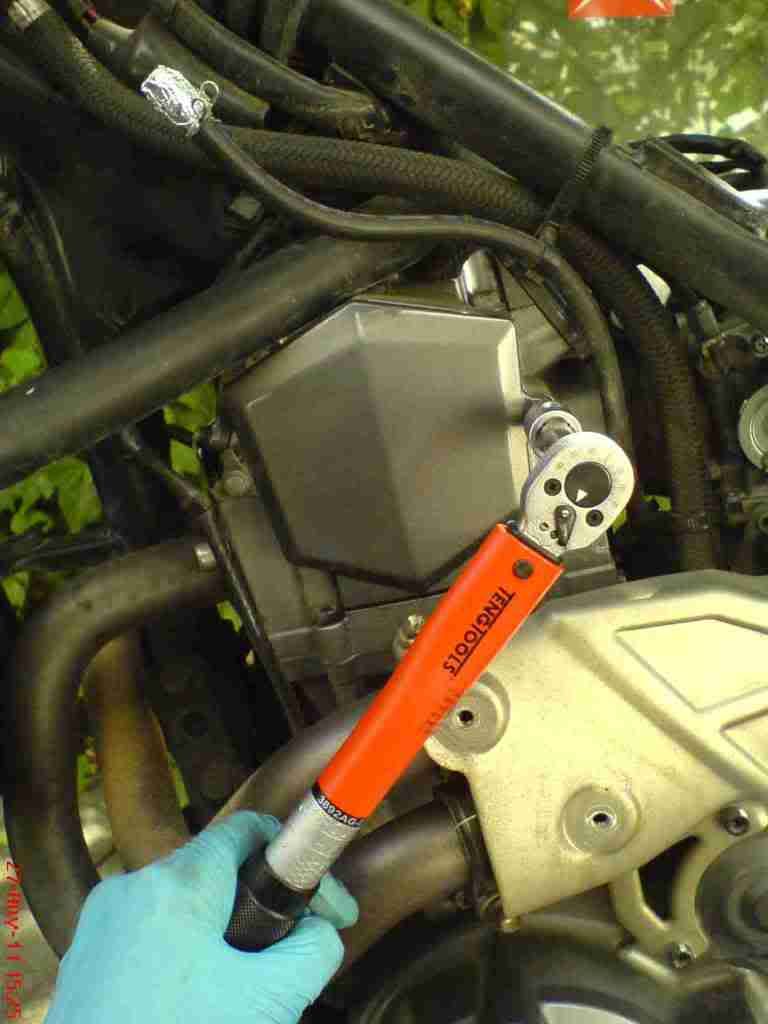 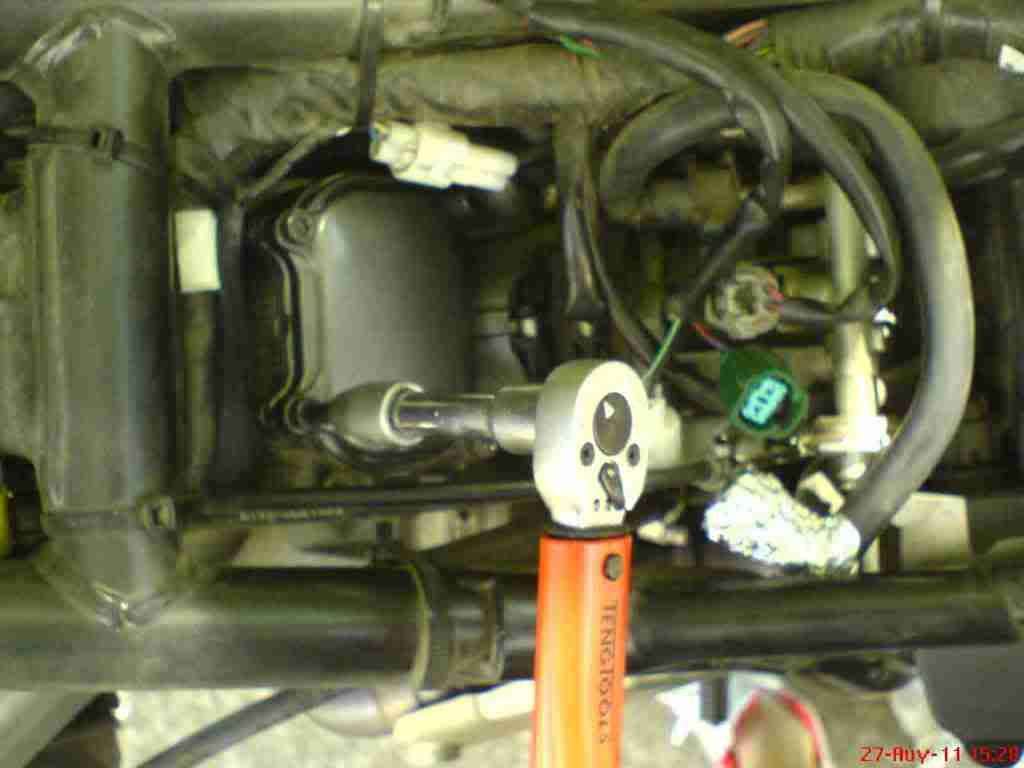 45. …the spark plug (the new plug came with pre-adjusted electrode gap at 0.75mm) … 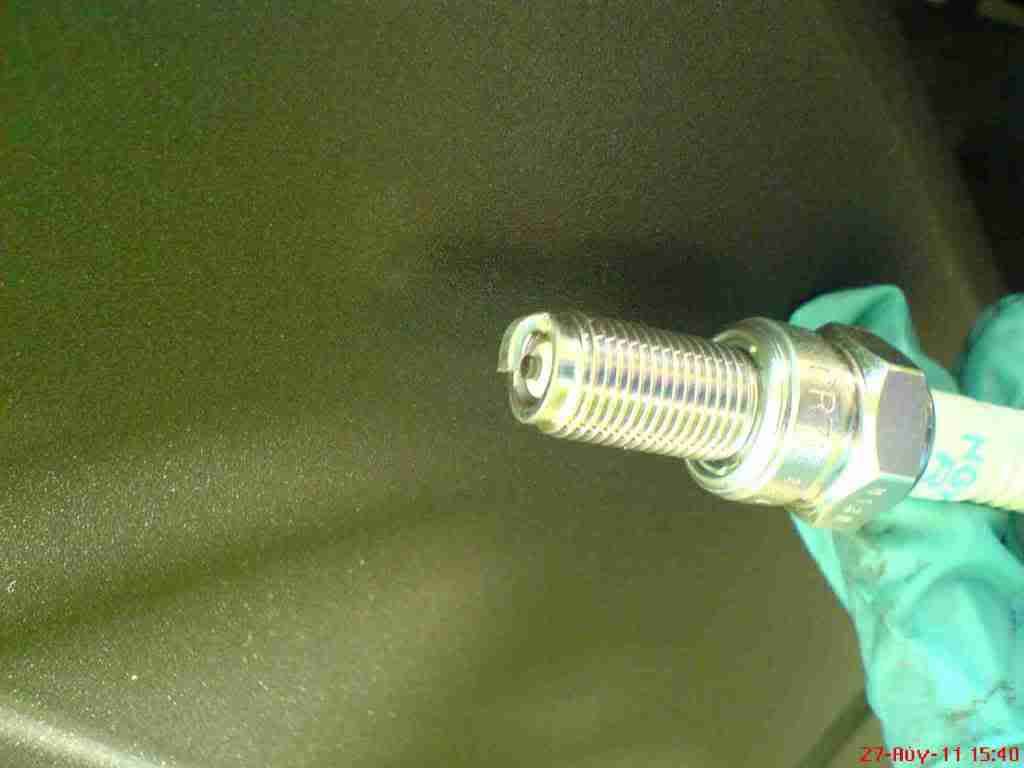 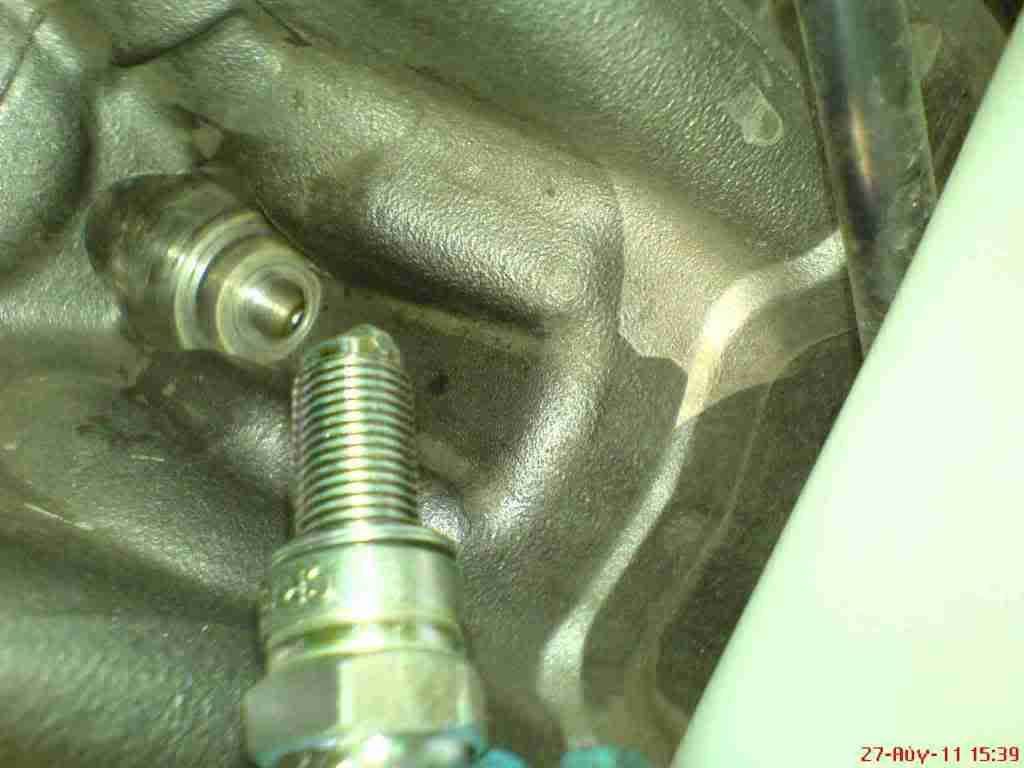 46. …the coolant draining bolt, the 2 hoses… 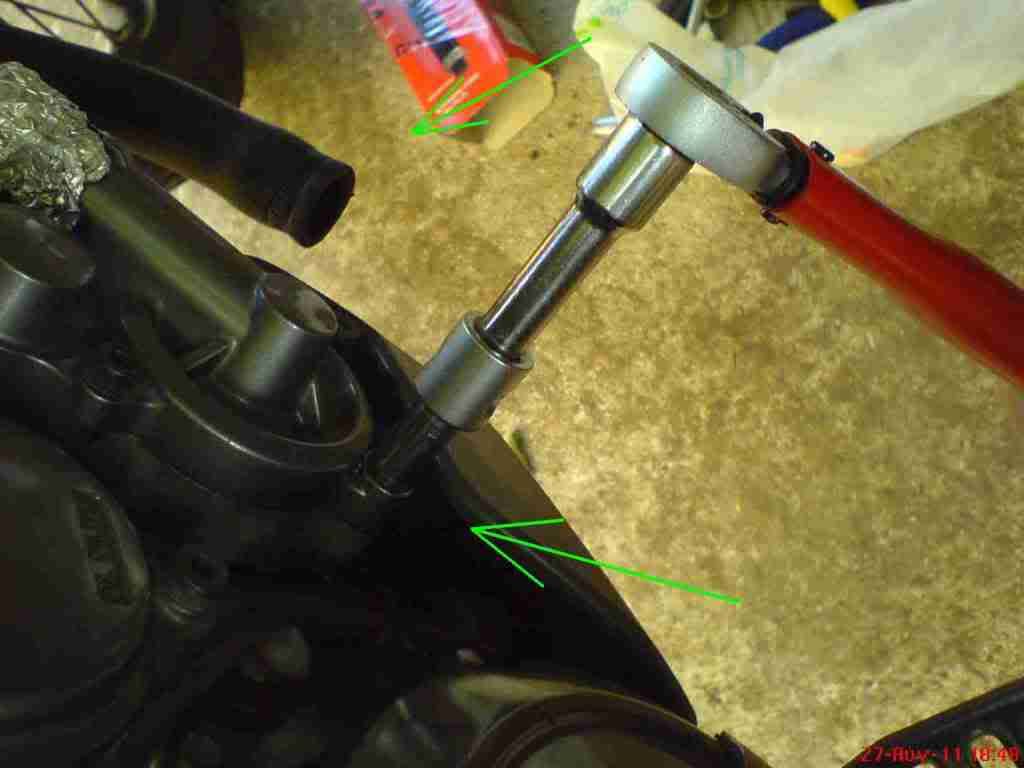 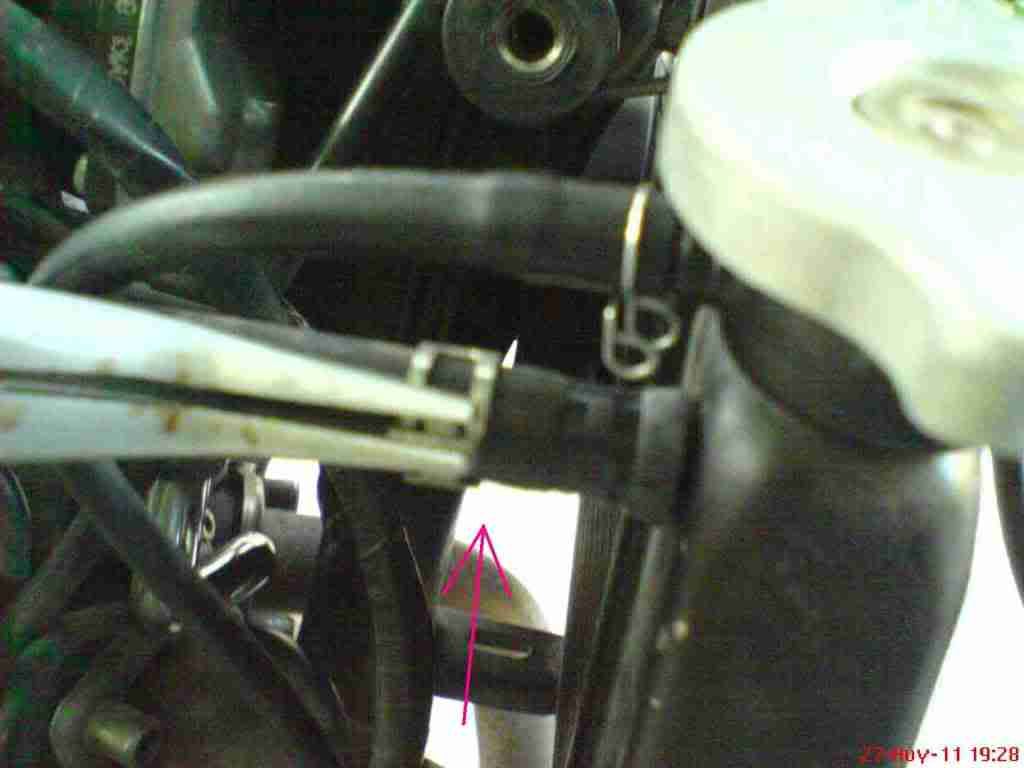 47. …the fan, the radiator, the coolant and finally the fuel tank. 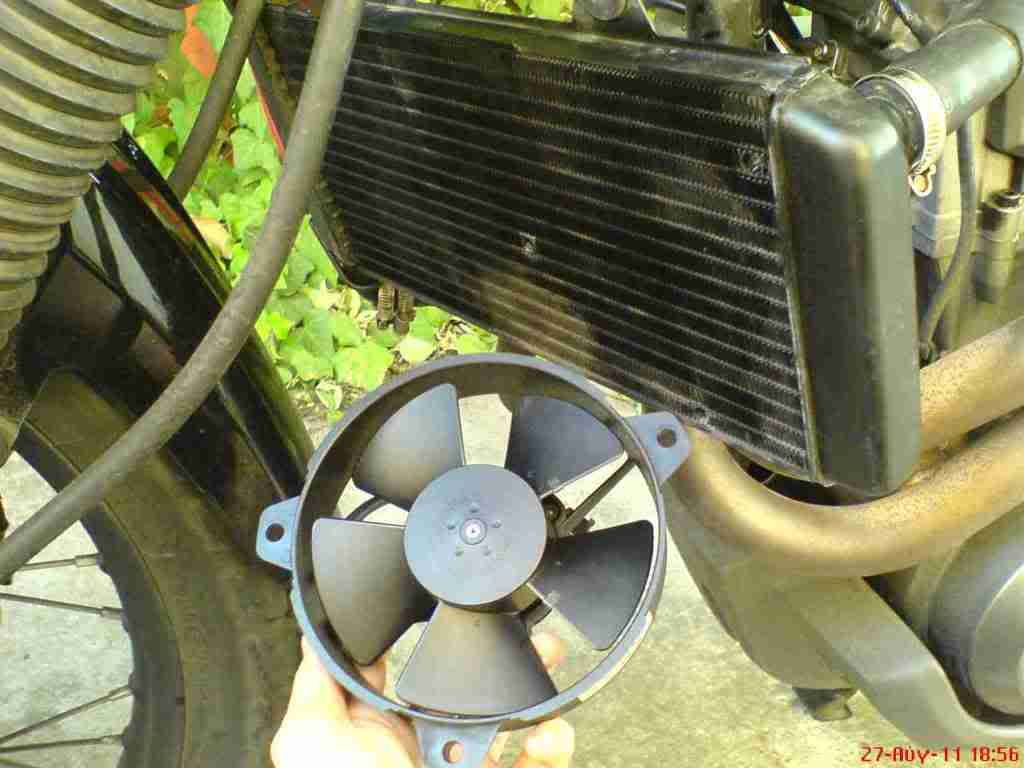 48. Next was the air filter’s turn. I removed the case cover… 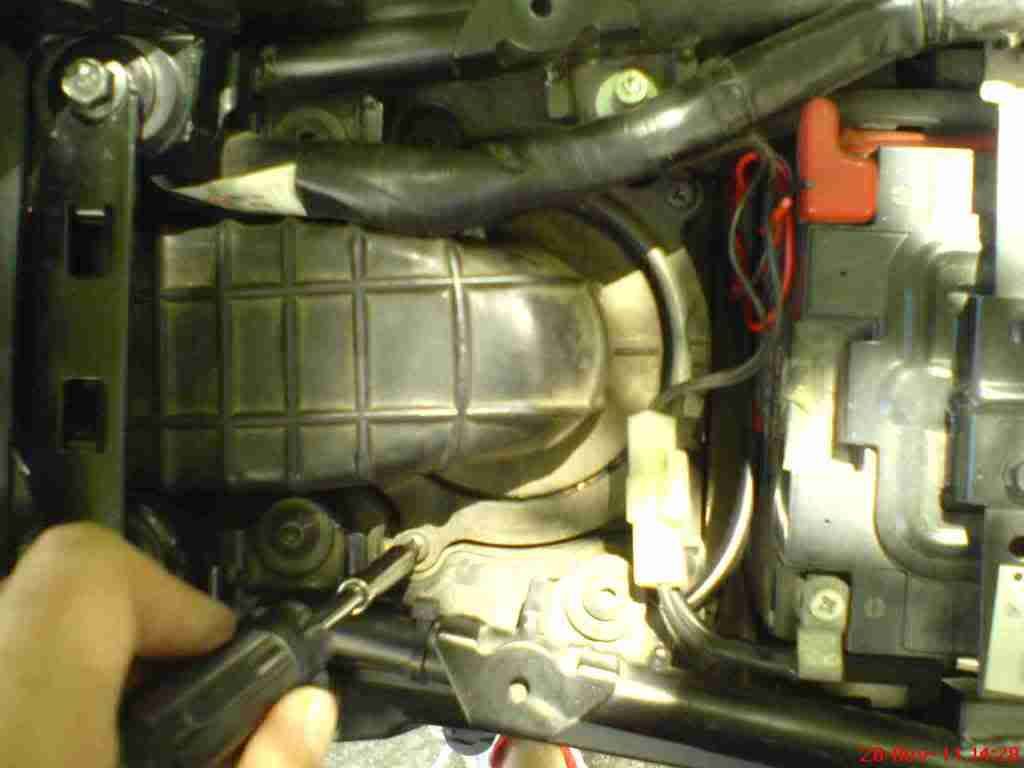 49. …the old air filter… 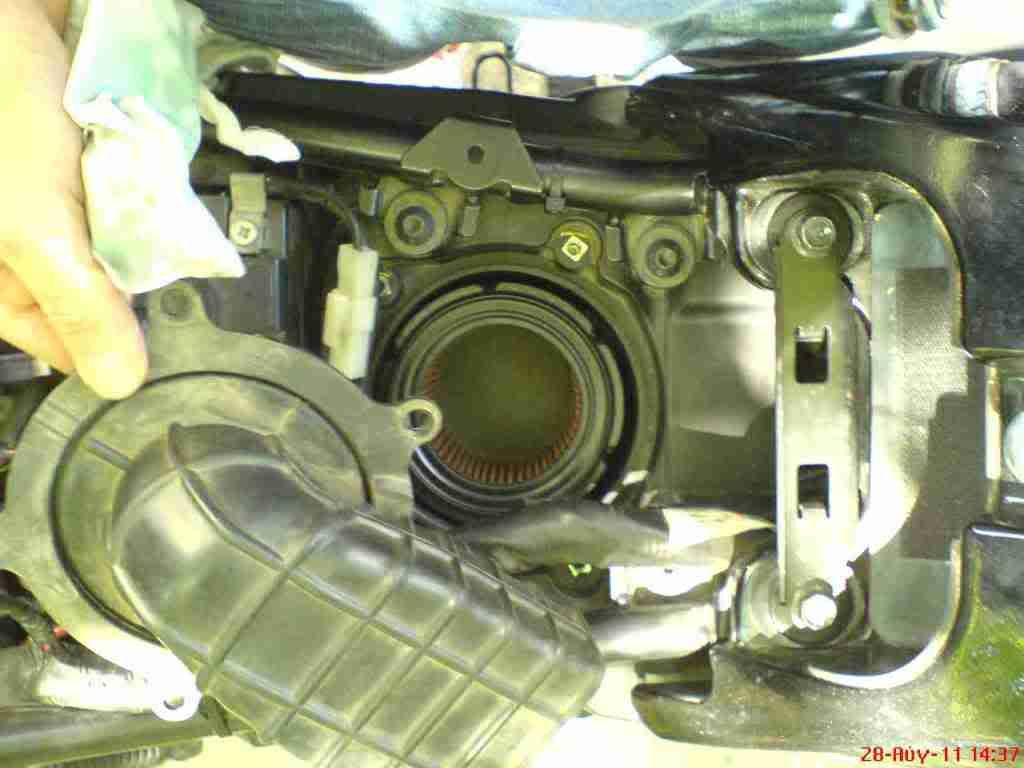 50. …(the air filter housing was sufficiently clean)…  Last edited by zeiss11; 04-09-11 at 18:23. |
|
#
7
29-08-11, 21:57
|
|||
|
|||
|
Very good DIY show. I want to do the same but I have to do it for my next 40.000 km. I find the fuel tank unmount a little bit complicated, but I hope to do fine...
|
|
#
8
30-08-11, 00:07
|
|||
|
|||
|
Great pics and description
Thanks for the report and pics, you have inspired me to do my 20k service myself too.

|
|
#
9
31-08-11, 16:15
|
|||
|
|||

|
|
#
10
02-09-11, 21:49
|
|||
|
|||
|
Hi zeiss11, didn't you fancy doing the steering bearing and suspension linkage greasing, they are due at the same interval as the v/v clearances?
Very good write up by the way, I did my valve clearance at 12k miles (20k km) and they were within spec thankfully. All the best. |
|
| Thread Tools | |
| Display Modes | |
|
|
|
|


 Hybrid Mode

